Blog-Old

General Font Tips

Sometimes having a few tips on fonts can make it easier to decide what font to go with. I already had a post on fonts Here that covers general font info. Today I’ll talk about choosing fonts for a project and offer a few more tips.

When to use Serif vs Sans-Serif…

For book projects it’s often recommended to stick with serif typefaces when dealing with a lot of text, it’s supposed to be “easier to read“, though not on “small devices“. This is often quoted from old research that is still debated. For further research on why I think serif does not improve reading compared to sans-serifs check out the link below and decide what you think about it.

Which Are More Legible: Serif or Sans Serif Typefaces?

The old research had numerous flaws, couple this with accessibility issues means I can’t recommend serif fonts as a default automatically.

Accessibility

Those with disabilities such as Dyslexia would say the opposite about serifs, stay far away from serif typefaces and focus on sans-serif. Special fonts like Dyslexie and OpenDyslexic were created for that purpose, to be easy to read.

I find those fonts (Dyslexia, etc) a bit hard to read myself and with over 7 studies it has yet to be proven effective. Considering Dyslexia is mostly a neurological issue, generally, visually changes won’t help but perhaps it makes the page more fun and inviting which might encourage readers. One of the big issues for me with those fonts is the contrast with those fonts, but it might just be poor website design.

Now, while sans-serif fonts might not help with dyslexia. It is considered a way to help those who are visually impaired. Common fonts such as Times New Roman, Verdana, Arial, Tahoma, Helvetica, and Calibri are recommended by the US Department of Health and Human Services for disabilities, notice it’s a mix between serif and Sans-serif? These fonts are common on the web and in print, they also pass the No Coffee test better because of their simplicity, or at least the sans-serif one does. You can try this vision simulator if you want to learn a little more.

What was most helpful for all readers was increasing white space on the page so keep that in mind for accessibility. No matter what font, spacing is important.

Typeface Stereotypes

Serif typefaces are often considered more authoritative, professional, clinical, institutional, historical and elegant. Some popular serif fonts would be Georgia, Garamond, Times New Roman, and Baskerville.

Sans-serif are often considered cutting-edge design, modern, childlike, contemporary, approachable, personal, and clean. Some popular fonts would be: Arial, Candara, Century Gothic, Roboto, Loto, and Verdana.

Can you use a serif typeface in a childlike way? Of course. Can you use sans-serif for something professional? Of course. There are no true hard set rule which typeface must be used and for what purpose, for example…

Trying to find his way out, Bilbo went on down to the roots of the mountains, until he could go no further. At the bottom of the tunnel lay a cold lake far from the light, and on an island of rock in the water lived Gollum. He was a loathsome little creature: he paddled a small boat with his large flat feet, peering with pale luminous eyes and catching blind fish with his long fingers, and eating them raw. – A random quote from The Fellowship of the Ring.

Do not meddle in the affairs of Wizards, for they are subtle and quick to anger. – J. R. R. Tolkien

You’ll notice how I mix serif and sans-serif through all my blog posts, personally, I like that look. I have a soft children’s Sans-serif font Abeezee and a more formal serif font for the rest. It’s all just personal preference in my opinion.
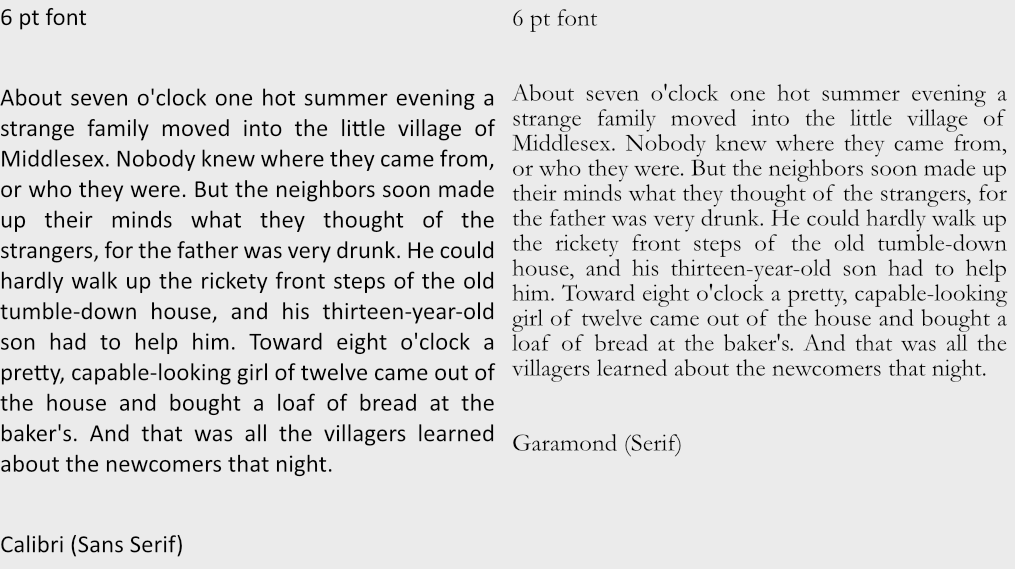
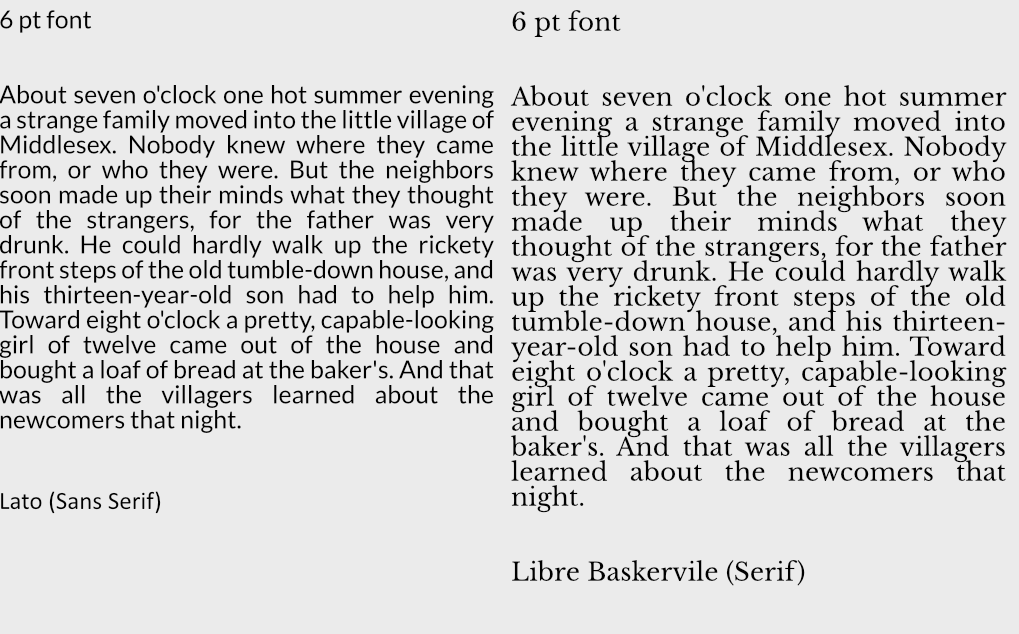
Now does a certain typeface save space? I would say no.
Opening quote from The Boxcar Children.
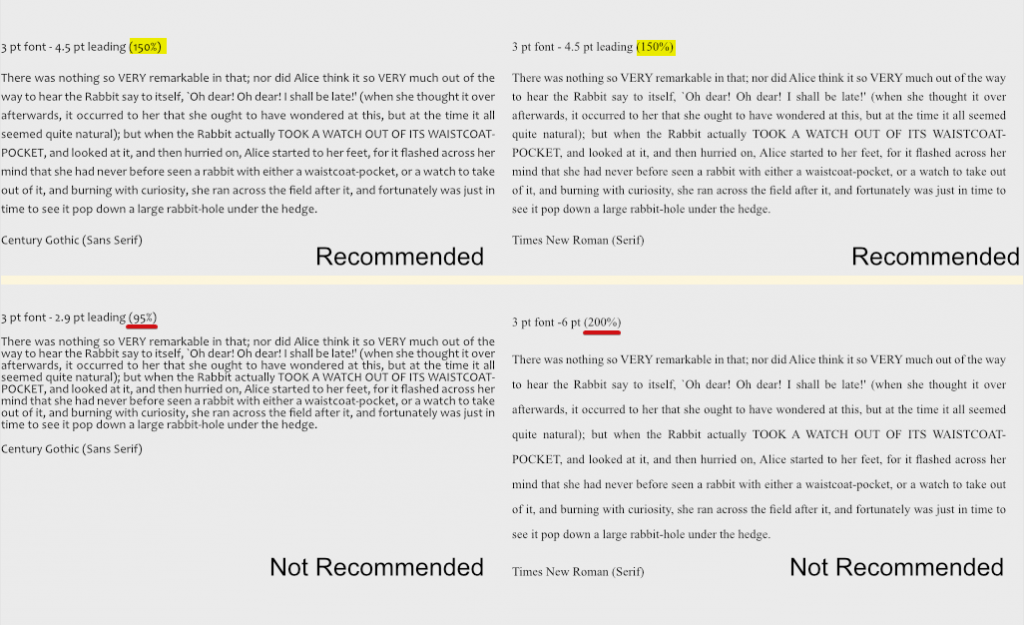
Quote from Alice In Wonderland showing these different typefaces at size 3 pt.
Which one is more readable to you?
When in doubt, test your typefaces and see if your users like them. If you need to save space just try different fonts within the same typeface until you find something that works for you.

What Font Sizes Should You Use?

In general 8 to 12 point (pt) is standard for print materials with most leaning towards 12 point. Headers tend to add 2,4,6,8 more pts to that depending on the size. There is a system you can use for a range of font sizes though called…

Modular Scale Font Sizes

There is a system out there called Modular Scaled fonts, you can use this to find the ideal size of fonts or play around with different font sizes to see how they look.

For websites it’s recommended to stick within these ballpark of sizes: 8, 16, 24, 32, 48, 64, 95

But with modular font sizes you can adjust to fit the needs of whatever platform you are working on.

Leading Sizes

As far as line-height(leading) itself goes there is apparently a magic number of 150% that seems to do the trick to make most things presentable. So if your font size is 8 then 8 x 1.5 = 12 leading, again for 12 then your leading should be 18. Now this doesn’t always work, but it can be a starting point if you are unsure of where to start.
Accessibility

There is a design standard for font sizes found on W3C. This can help with choosing font sizes.

In short:

  • Line height (line spacing) to at least 1.5 times the font size; (magic number from above) ⬆️
  • Spacing following paragraphs to at least 2 times the font size;
  • Letter spacing (tracking) to at least 0.12 times the font size;
  • Word spacing to at least 0.16 times the font size.

White Space

White space does a lot for a design. It brings clarity, and elegance. It’s bold and thoughtful. It makes things easier to read and naturally will organize a page.

It can add a touch of elegance.
Or call to action.

It can highlight information.Just like this.

It puts less stress on the reader and leads to longer view times. It also can improve comprehension by almost 20%. So be generous with white space when you can. Don’t be ridiculously generous though, some sites out there space stuff so generously it slows you down to scroll through. Also white space doesn’t need to be white, black or blue as anything else can serve as white space. White space is just about proper spacing.

Font Properties

How many fonts or font colors should you have in your product? It depends but less is more. I suggest generally sticking to 1-3 colors is ideal, and up to 4 fonts for headers, paragraphs, quotes etc is recommended.

Also remember that contrast makes a lot of difference. When choosing text colors make sure to check if they have enough contrast. There are tools out there that help such as WCAG and other tools. Some tools even help generate color palettes that may help. Also consider that screens will have different color settings, brightness settings and contrast settings that can throw off colors, check your colors on different screens if you must use lower contrast colors. Remember when possible to try to not use color to convey all meaning, in fact that’s a web design standard now, add other ways to express meaning such as bolding text or changing font sizes to help convey what you need to. For a few more ideas on designing with accessibility in mind check out this article.
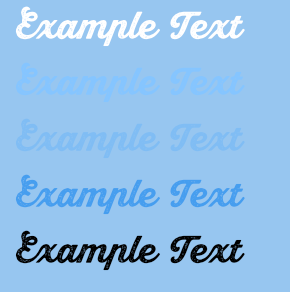
Examples of high and low contrast.

Creating UI for Birdboys (Part 1)

So my friend wanted to create a FPS (First person shooter) to practice networking. I thought this would be a good time to practice rigging and modeling. We sat down a few days ago, went over the design, and I started working on the bird model and rigging for a cowboy themed game. I don’t have a lot of experience in that so my modeling and rigging was pretty slow..

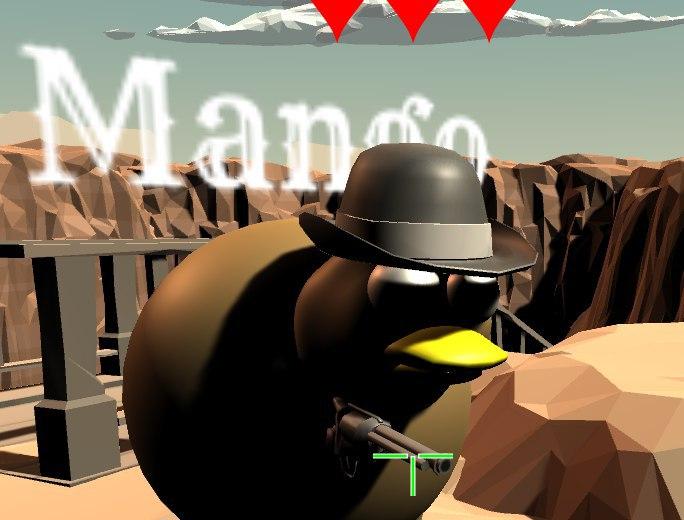
I redid the bird multiple times… But this was the original bird.

Here is a later model that I was testing it out – I figured I’d redo the model again later, so testing it out would be fine. After spending time learning how to setup IK’s in Blender, I came to realize they don’t work in Unity like I hoped to my disappoint.. There are ways to make them work but they aren’t as easy…

My original goal was to make these awesome sculpted birds all fully rigged and maybe animated. That didn’t really turn out like I hoped, I’m pretty bad at sculpting for one thing and got lost often. My programmer didn’t know how to handle bones and wasn’t exactly happy I requested procedural animation and send them an article on how to implement it. But they said they would look into it.

Anyways!

Even though modeling & rigging takes me forever from my lack of experience, UI is a different story.

Main Screen

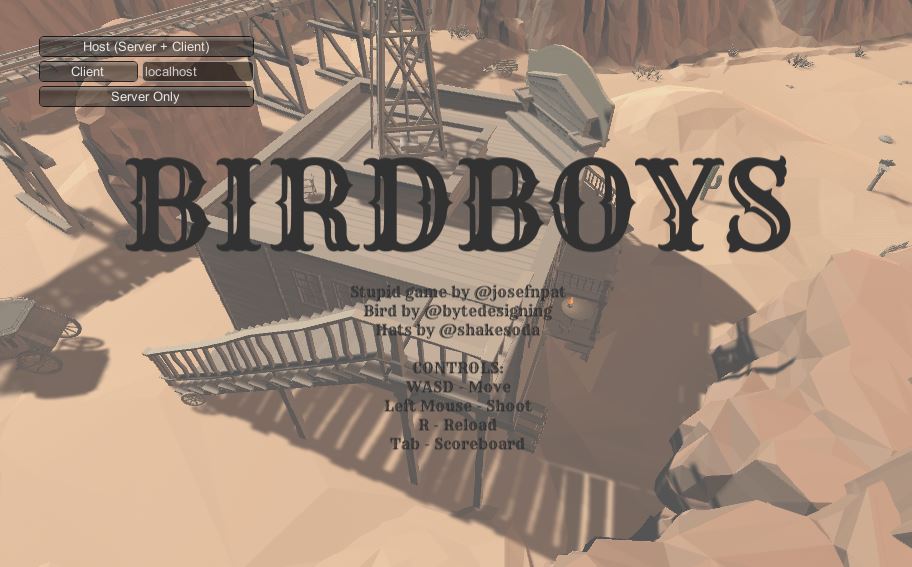
I asked about some requirements, took down some rough notes, stared at what the programmer came up with and panicked for a minute…

I thought I could not improve this at first glance!

But then I came to my senses and I looked at western UI from other games, I didn’t actually see much I liked but it gave me some ideas on maybe where I could improve. I wanted something cartoony, but with a strong western feel.

So I started a quick mock-up… I actually tried some wireframe tools but found them so slow and painful to use, I just put them away. I like the idea of wireframe tools but if it only takes me an hour or two create some starting assets, it’s just faster for me to mock-up and create at the same time. I thought I’d just skip ahead and in an few short hours I created a starting point for what I wanted the mock-up to look like. I know I’m terrible for not doing concept art/wireframes but sometimes it’s better to make something then be stuck moving boxes around.

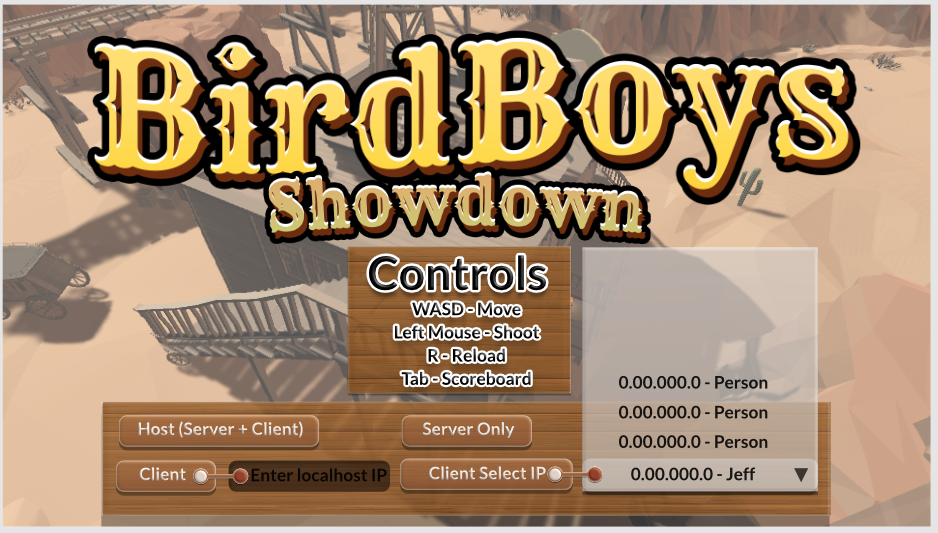
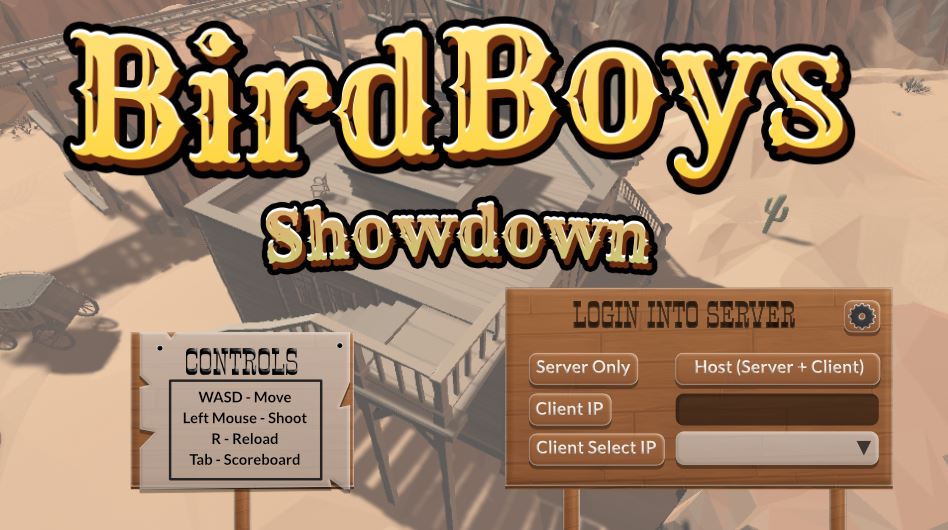
My thoughts on this was I wanted the center background to be the easiest to see, as the background changed a lot I didn’t want to cover it up. I can always condense the server stuff even further if I need to make it easier to notice the background. I choose a dropdown to handle server stuff because I figured that was faster to search then with other methods, but they could also directly type their IP as well. I’m sure someone out there is dying from OCD because none of the stuff below is properly lined up.

I didn’t really put much effort in this yet.

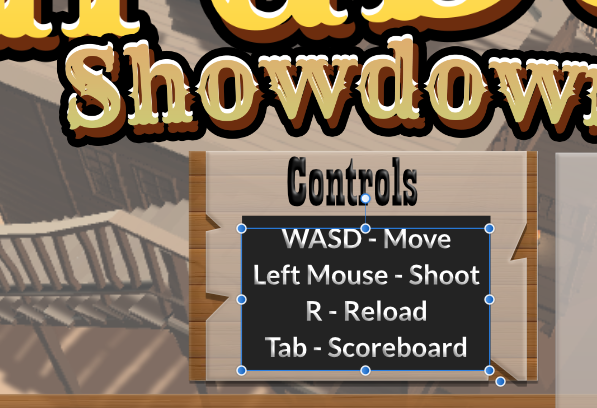
No, I didn’t have all the fonts picked out yet, I didn’t know what to do about colors yet either, I just wanted to get some ideas out there for now. I passed it over to the programmer for review, he thought it was a good start and I agreed with him. This is basically a bunch of boxes with a texture laid on the back, so it’s basically zero effort. The title I pushed through a logo template set I have, I’ll have to fix it later but it got the idea across. I decided to stick with the open source Rye font the programmer choose and added Lato which I thought was cute. (Obviously not as cute as bookman sans but that isn’t open source)

We talked about converting the Controls section over to a wanted poster for some visual interest, I thought that seemed like a good idea, but I would need another font for that. So me and the programmer looked for some open source fonts and I wanted something similar to Mircosoft’s Playbill. We eventually settled on Smokum, and I did some quick work on the wanted poster.

I wasn’t sure how to go about the wanted poster idea but I wanted something simple. You can see the Playbill font above.
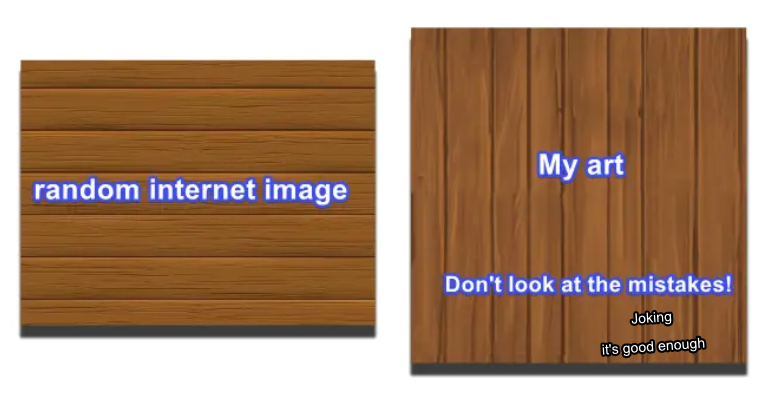
Well, from here I broke down some art assets I figured I would need at some point… Because I thought I’d do the easy stuff first. I made some wood and called it good enough and thought about what to do next.

But I was stuck now.. I needed a better way to handle input.

I decided to redo the menu again & just condense the info.

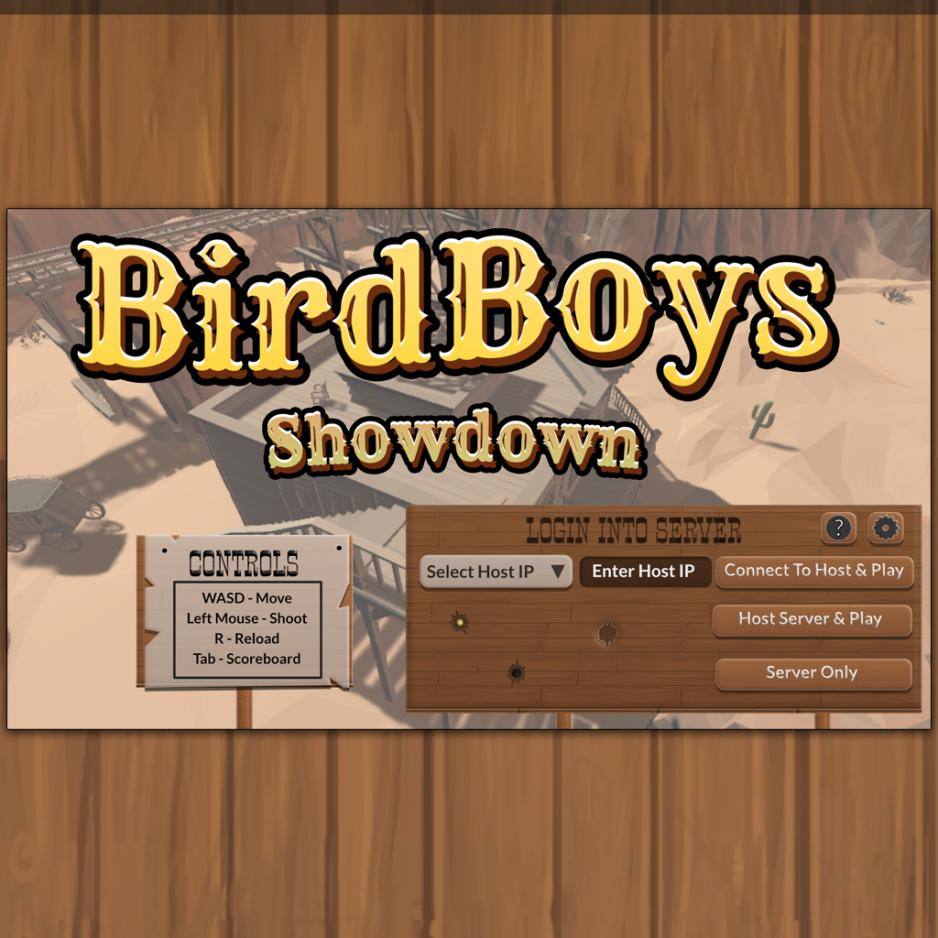
The programmer was pretty upset with this redesign and it’s understandable. He wanted me to condense the Client options, add another option and fix the flow. After some back and forth we eventually came to use this.
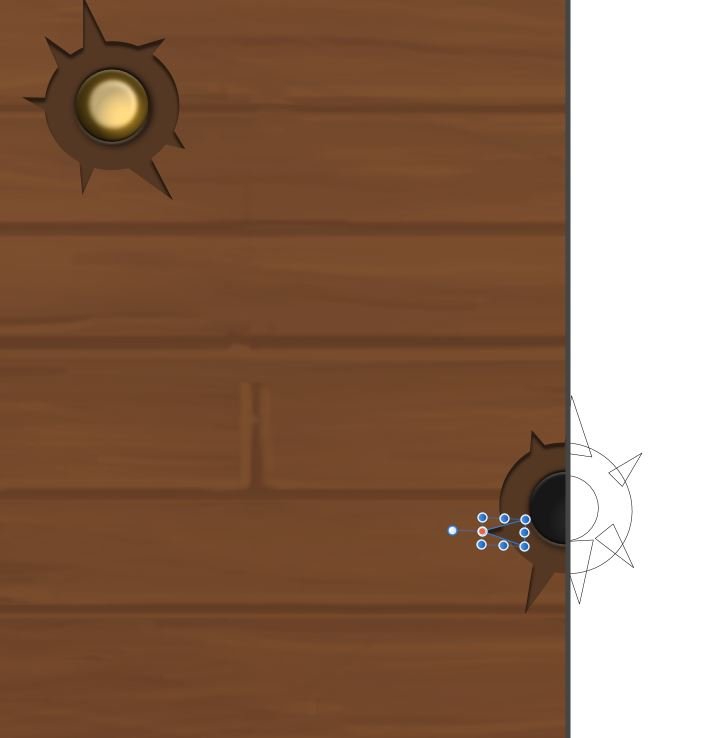
I put a few bullet holes in the sign, it’s still kinda on the empty side though.

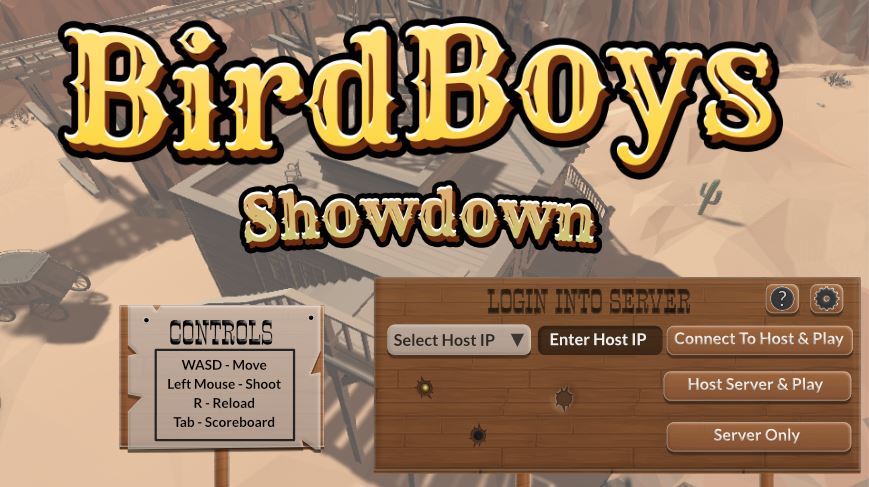
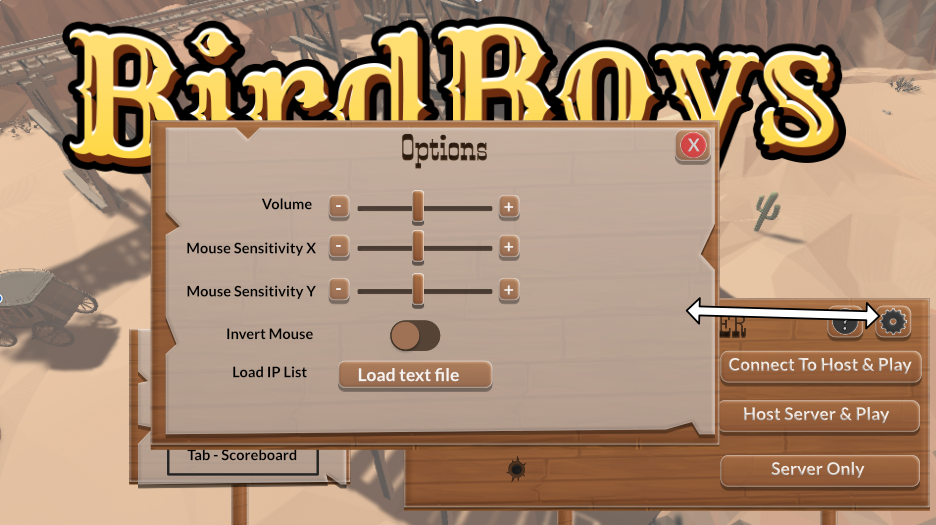
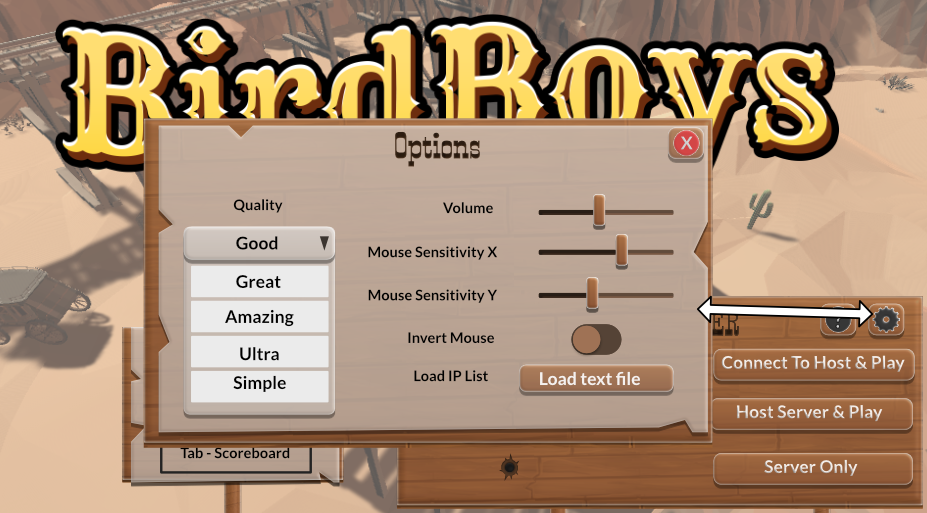
And that was the final mock-up. I added a few more buttons for later on in case we needed them. An Info button that would talk about server info (or anything else, sometimes I just make “back-up” buttons we can repurpose as needed) and an options button that would allow you to change volume, mouse sensitivity etc. I also added some bullet holes, some part way through and some actual holes. I also changed the text because I didn’t quite get the programmer jabber and tried to make the options make “more sense” since the programmer complained my labels didn’t make a lot of sense, I said his initial specs would not make sense to the average player so there I wrote it easier for the layman to get started.

Now I know dropdowns can drive people crazy, and perhaps there may have been a way to combine the input text field and dropdown field as they were combined -Some might call this a “searchfield” dropdown. I wasn’t sure if Unity allowed such an option (might be something we could code in though) and I also was not sure if it would be clear to the user what info they needed. The Select Host IP info would be coming from a text file of the users creation.

Yeah, these are zero effort bullet holes. Pretty much just layer effects
Hey, creating a wood texture is easy, here is a video on handpainting textures if you want more info.
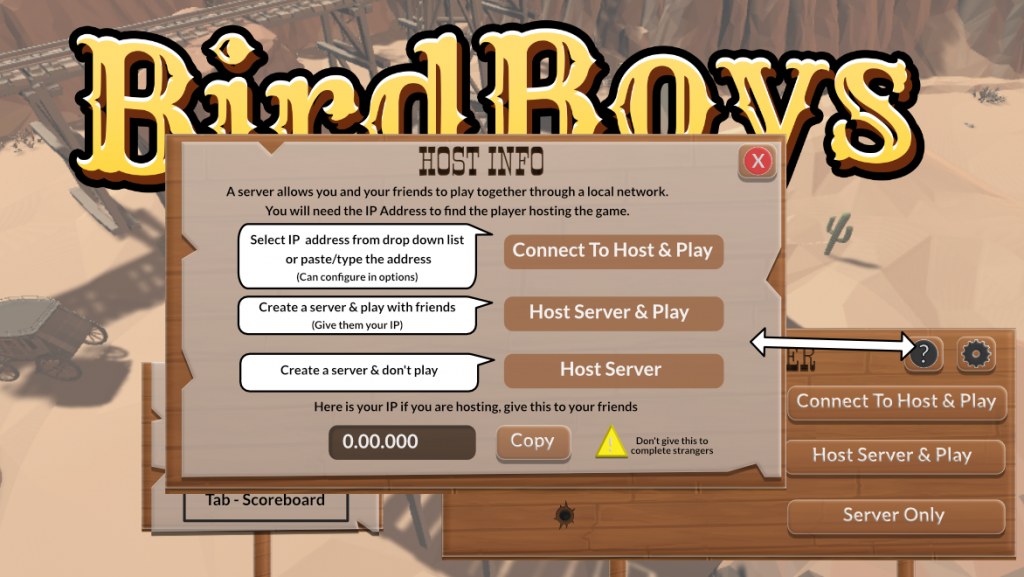
For those wondering what the ? button did.

Above is a quick mock-up with a little more info on how to handle hosting, it will need some more work…

First pass at a quick options screen
second pass at a quick options screen

Anyway I’ll continue to update this post as I keep working on this. I’d like to show the in-game version later on, along with the rest of the menu’s….

To be continued…

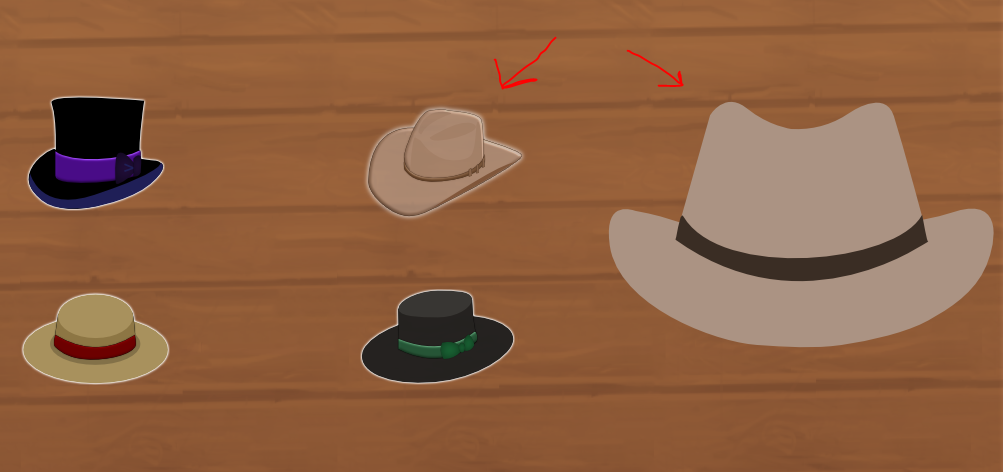
Score Screen

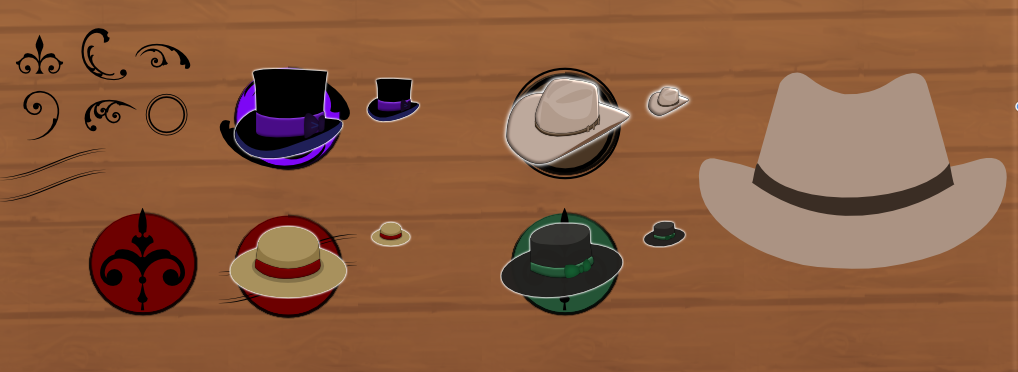
Originally with the score screen I wanted to use some icons to show teams so I created some icons and debated how they would look. Now, I feel score screen is not the right term, perhaps I should say current score screen vs result score screen. Because they are two different screens with two different priorities. I did briefly get them mixed up, with a results screen flashy icons make sense, with a current score screen they do not.

A current score screen should be small and out of the way as much as possible during gameplay, a results score should take up more space as it’s no longer during gameplay and allows the player more time to go through stats and think about the game.
Debating style choice
Starting to overthink it now… Switched gears…
This concept was pretty bad…

In the end though, I didn’t like the icon idea and thought about doing something completely different that I think fit the game style better. The icons were too realistic for my cartoony UI from earlier and I saw it as a style clash.
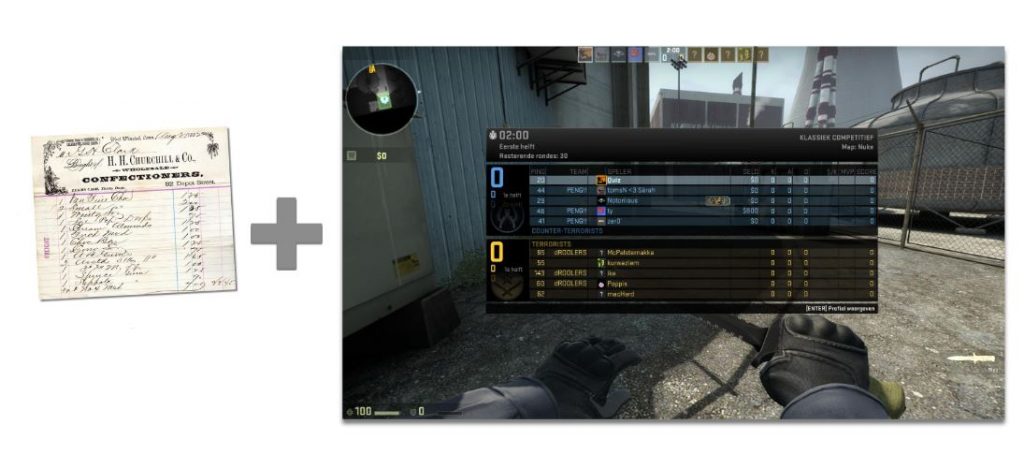
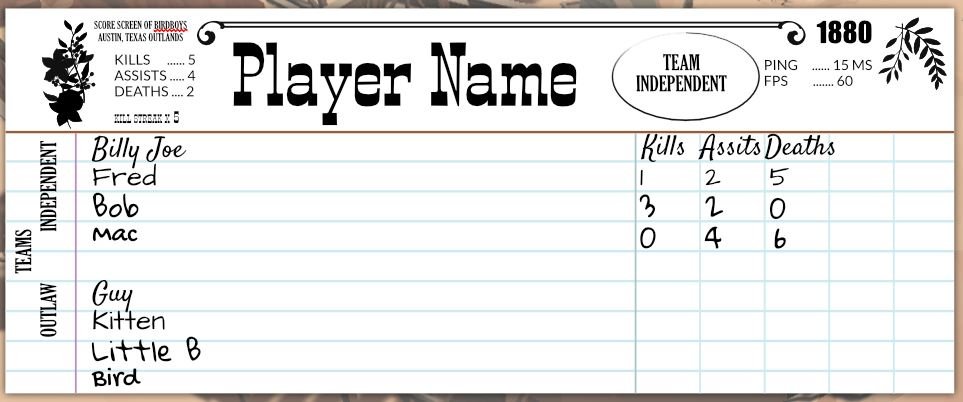
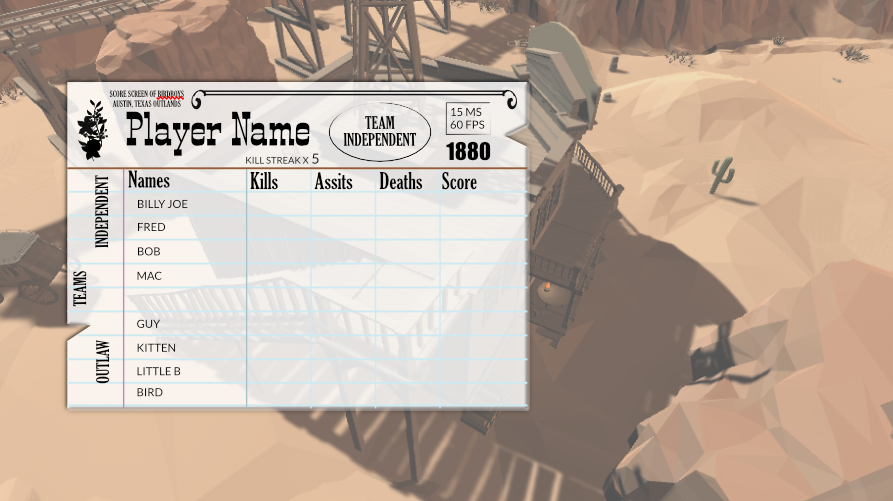
I decided to try and combine other FPS score screens with 1800’s ledgers or bills of sale

Using this method I would be able to condense the info better, and keep it fitting the style better, or at least that was my goal. Here was a quick draft I made an hour or two to send over to the programmer to ask his opinion on this direction. Man did they use a lot of different fonts on old paperwork. I know the general idea is to stick with one to three fonts, but that felt too simple compared to my reference art.

The different fonts for different players idea was veto’d quickly as it should be

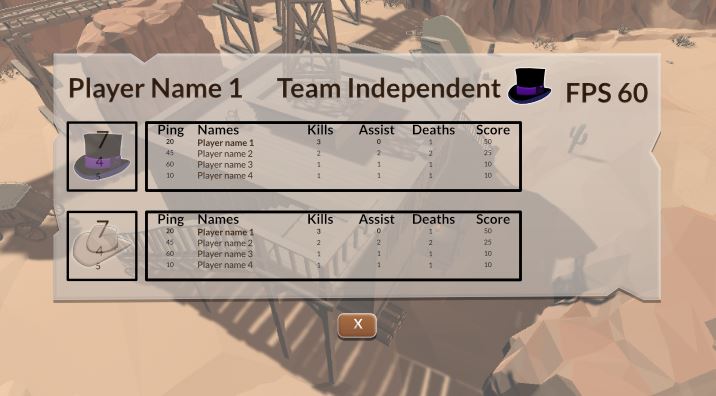
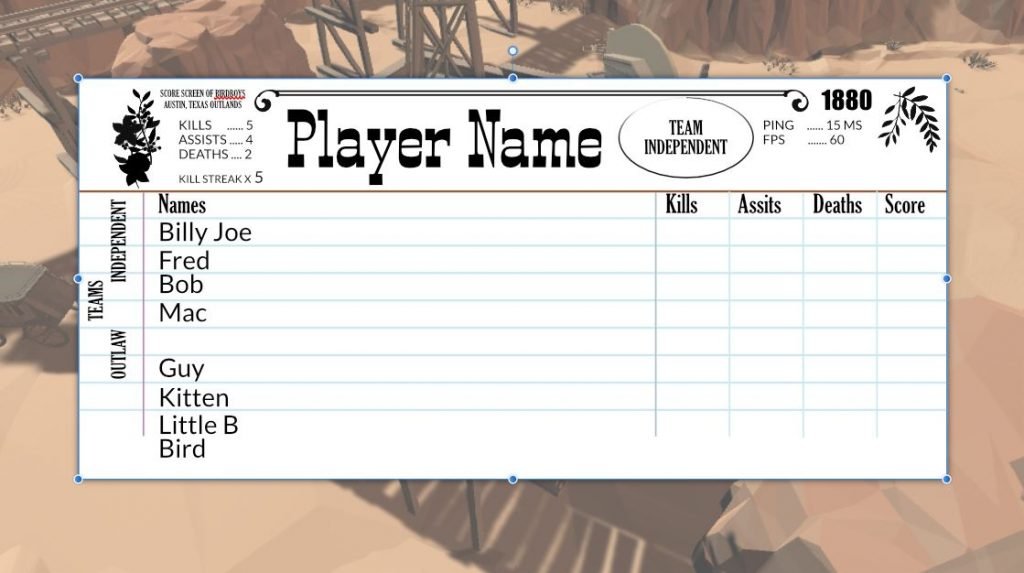
I whipped up an example trying to combine the best of both worlds. Yes, the graph would need another row, I’d need to make further adjustments on fonts, positioning and more but it gave me a direction to go in. The programmer liked it for the most part and we went over ways to improve it, mostly visually which I was not worried too much about. My main concern was can I convey the info well, and did it need to take so much space…?

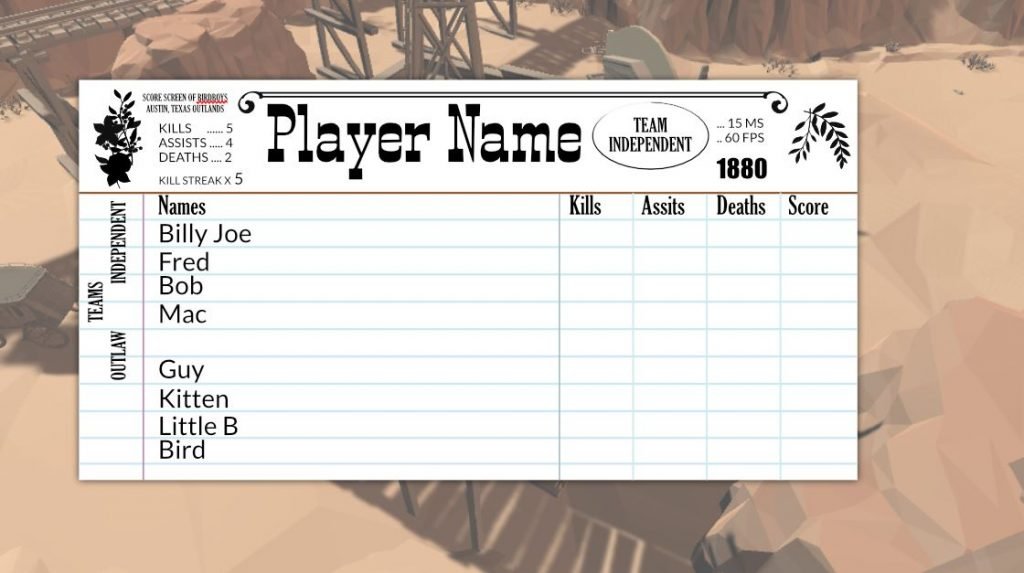
I would continue to chip away at the design. I really liked how wide it was visually… But I wondered if it was just too big.
Why waste useful space if I didn’t need too.

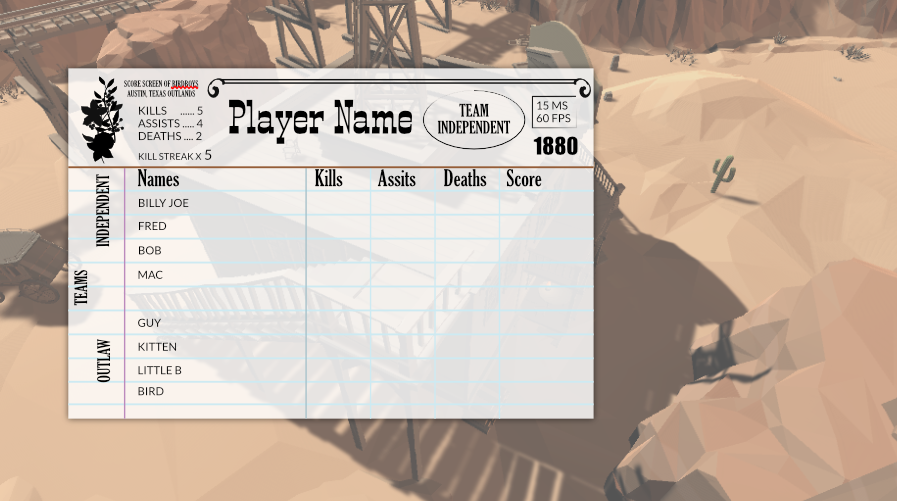
So after condensing everything once more I sent it off to the programmer for review. I wasn’t sure how I felt about transparency, on one hand it makes it easier to see players behind the screen, on the other, it doesn’t look as nice with those blue lines..

I was starting to hate the design (It was becoming too busy visually, didn’t feel playful either..) so I figured now was time for feedback.

This will be continued in a follow up post now. Stay tuned.

A Collection of Free Design Books

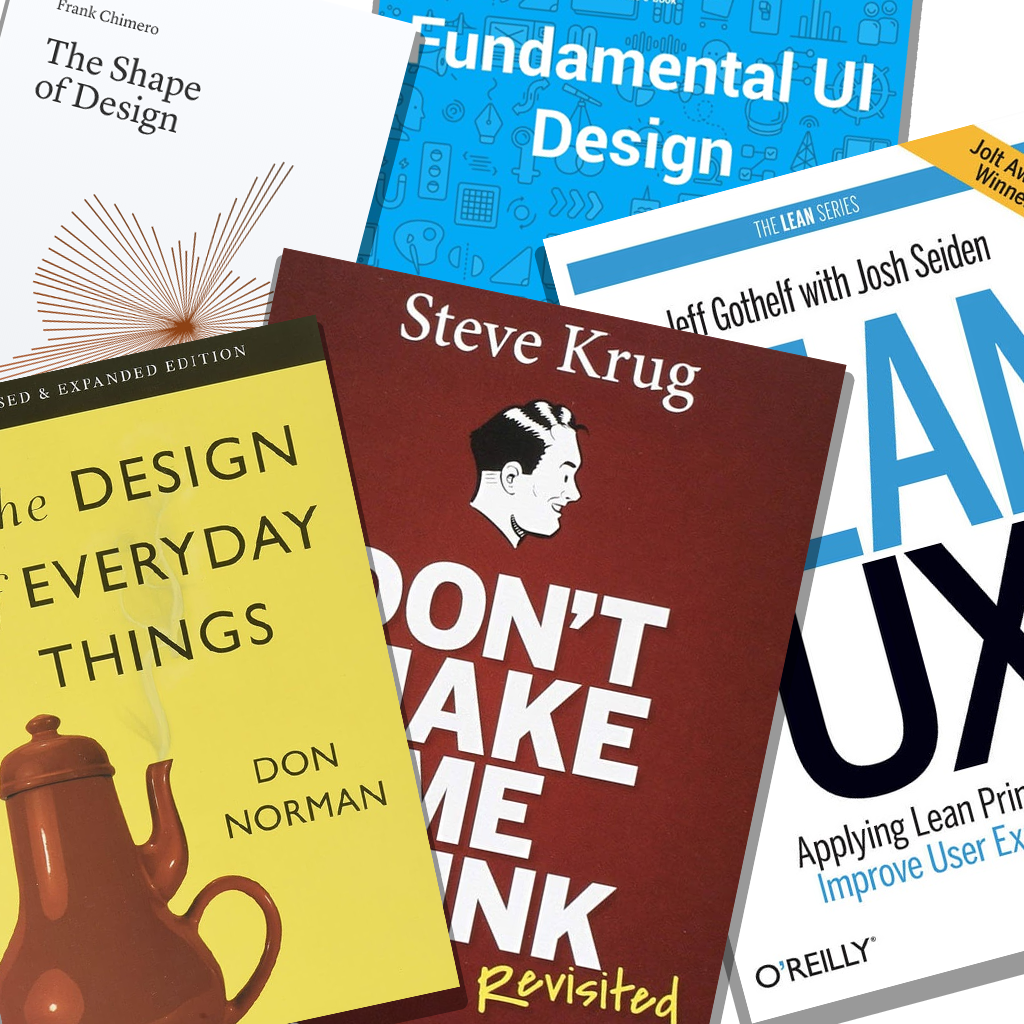
Are you looking for some design books to read this summer? Well, to my surprise I found a huge assortment online, completely FREE. Wow, I was rather surprised as there are quite a lot of famous books in here. Why not check it out yourself?

First I have to mention this site called freeuxbooks, sounds kinda shady though right? I mean these can’t really all be legit free? Well, I was able to download a few books off it without any real issue. They all are linked to this website called Academia which is for research papers. I’m not exactly sure how that works with copyright though, but considering some of these books were made from blogs, I think they may have something… Though, it still is a little fishy, correct me in the comments if I’m wrong!

Anyway FreeUXBooks has a list of books available: The Design of Everyday Things, Don’t Make Me Think, 100 Things Every Designer Needs to Know About People, and more.

There are also a variety of resources outside of that. UXplanet posted a variety of free resources here. I posted some below that look interesting they are fully web-based so enjoy and meant to be shared. This page really promotes sharing too.

Also free online
More free books

Not sure if it’s legit either… But it seems most design books are now available…

The Non Designers design book

Universal Principles of Design

The Best Interface is No Interface

So if you are looking for a book, perhaps just see what Google can find for you. And if you want the latest trends why not look at research groups?

If you are just looking for a quick UX refresher why not check out the Laws of UX?

Project Management Basics

I’ve decided to cover the basics of project management here. I did not get into any big technical tools but just covered the 3 things you should know before committing to a project.

The 3 things would be defining your goals, understanding your resources, and understanding why projects fail.

1. What are your goals? (Why & Who)

I think this is something honestly most people don’t want to think about. It’s far more exciting to just start building out some project and seeing where it takes you then to stop and ask Why you are building. I’m guilty of skipping this step often because just starting a project can be a lot of fun. Figuring out Who you are building for will help you focus a project. I’m going to just for the sake of simplicity break this down into three parts.

Do you want to sell this project? Then focus on what people want to buy. Look at your competition and see why they are successful and why they failed. Tools like SWOT (Strength, Weakness, Opportunities, Threats) can be a quick way to do this, alongside Competitor Analysis.

Is this just a showcase piece? Then focus on what types of strengths this brings to your portfolio. Think about why these pieces are important and who you want to see them. Showcase pieces are really the middle ground between a product for sell (yourself/team/tool/whatever) and doing something to learn. Getting feedback on showcase pieces is a good way to grow.

Are you doing this to learn/have fun? Sometimes being willing to play and learn is the best way to grow. There are two approaches to this I see. One is to follow tutorials, and learn how to think about a project, the other is to try and built it yourself and learn to how to do creative problem-solving. There are benefits to both methods and realizing the value of both methods helps keep you from getting burnt out or stuck.

2. What are your resources & scope? (How, What & When)

I think the how is something we often assume, or at least I do. I think being able to take a step back and look over the scope of what I want to achieve is important. Do I want to spend a weekend doing this or the next 5 years? What will I need to get this done? What am I willing to give up to make this happen is also something to consider, if you don’t have a lot of time either scope or cost will have to increase to try and maintain quality for example.

As someone who has hired contractors to work under me before, I can tell you, that triangle is a pain. Balancing my budget, my time and scope can be a huge headache.

How to approach project management

Some ways people approach scoping projects is with different mindsets such as Minimum Viable Product (MVP) – a way to create the most basic product necessary for feedback.

Another method becoming more common is creating products with the Minimum Marketable Feature (MMF) mindset, the idea is what is the minimum I need to sell this product.

The difference between MVP and MMF is one (MVP) is focused on prototyping (often for shareholders), the other is focused on being just good enough quality to sell (directly to consumers), so it’s beyond a basic prototype.

These two tools – MVP and MMF are based off of the Agile mindset.

Agile is a project management style of separating tasks and working on them in short sprints then getting feedback. Often these short bursts of work are around 1-4 weeks long but they can be longer or shorter depending on needs. Agile is great for projects with independent components such as one person changing the menus art and another person programming them. Agile doesn’t very work for dependent components though, Waterfall is used then.

Waterfall is very common in art-focused fields where you have to go step by step. If you don’t have a script you can’t design a character, if you don’t have a character you can’t create animations, and every step is dependent on the step before it. It becomes VERY hard to change directions with Waterfall systems, with Agile it is much easier. Neither is wrong, they just serve two different purposes.

In a nutshell if you have a set vision the waterfall method is very likely what you need, if you want feedback from outsiders then agile is better suited.

Because waterfall methods are so vision focused they have a very high failure rate compared to agile projects. Movies flop all the time and it’s important to understand why.

3. Where do projects fail? Back-up’s, design and technical debt

When it comes to creating products design is key. With Waterfall, product design is done in preproduction and does not really change, so the design needs to be really really strong. Agile products can have some weaker designs in the beginning but they have to build up a reasonable design early or else they may suffer technical debt long term.

Technical debt can lead to redoing work, throwing away work and/or poor quality with unfixable bugs or designs. You can avoid or manage technical debt by working on good design practices, such as having good documentation, testing designs (through prototyping and other forms of testing), strong collaboration and refactoring & cleaning up the project as you go.

Some systems that can help with this is source/ version control. Good source control makes it easy to roll back changes if they cause issues which allows for more experimenting & cleaning, it makes collaboration easier, and most have built-in ways to leave documentation of what you have done. Don’t mistake this documentation for proper project design though.

Another tool that really helps is design documents. There are a lot of types of design docs such as Game Design Docs (GDD), Developer style guides, Visual/brand style guides, Model Sheets, business plans among other forms of technical design. These documents help explain what the product is and define the requirements for the product, though in many cases they may be guidelines they are very important if you want to explain (or remember) what makes your product what it is.

Anyway to sum it up..

  • Think about who your audience is
  • Think about why you are building the project
  • Think about what resources you have
  • Think about how you will scope the project & when you plan to finish
  • Think about where you struggle and what tools/outside resources you can use to overcome that.

Software for Special Effects (FX)

Hey I wanted a write a quick post on some really awesome tools out there for special effects (FX). If you find yourself in a hurry to get some effects out here is some software that will help. You can use these effects for movies, games, whatever. I’ll probably add more to this list at a later date.

Particle Illusion (Free – Mac/Windows)

Swapping out images in particle illusion
Here I’m swapping out images
Example of particle illusion
The software is really user friendly (You don’t have to start/stop the animation but for recording I did)

Free, beautiful, 2,000 effects you can play with for free. The downsides to this software is it only renders to video (.mov & mp4) so for other projects you may need to convert for example to spritesheets for games or low end machines/devices. Converting from video to gif is really easy too so that’s another thing you may need to try later on.

It can export to 8k though so if you need something high end, this baby can make you some really nice effects fast.

I found this nice video that introduced me to this software and I think he did a good job covering it in 15 mins.

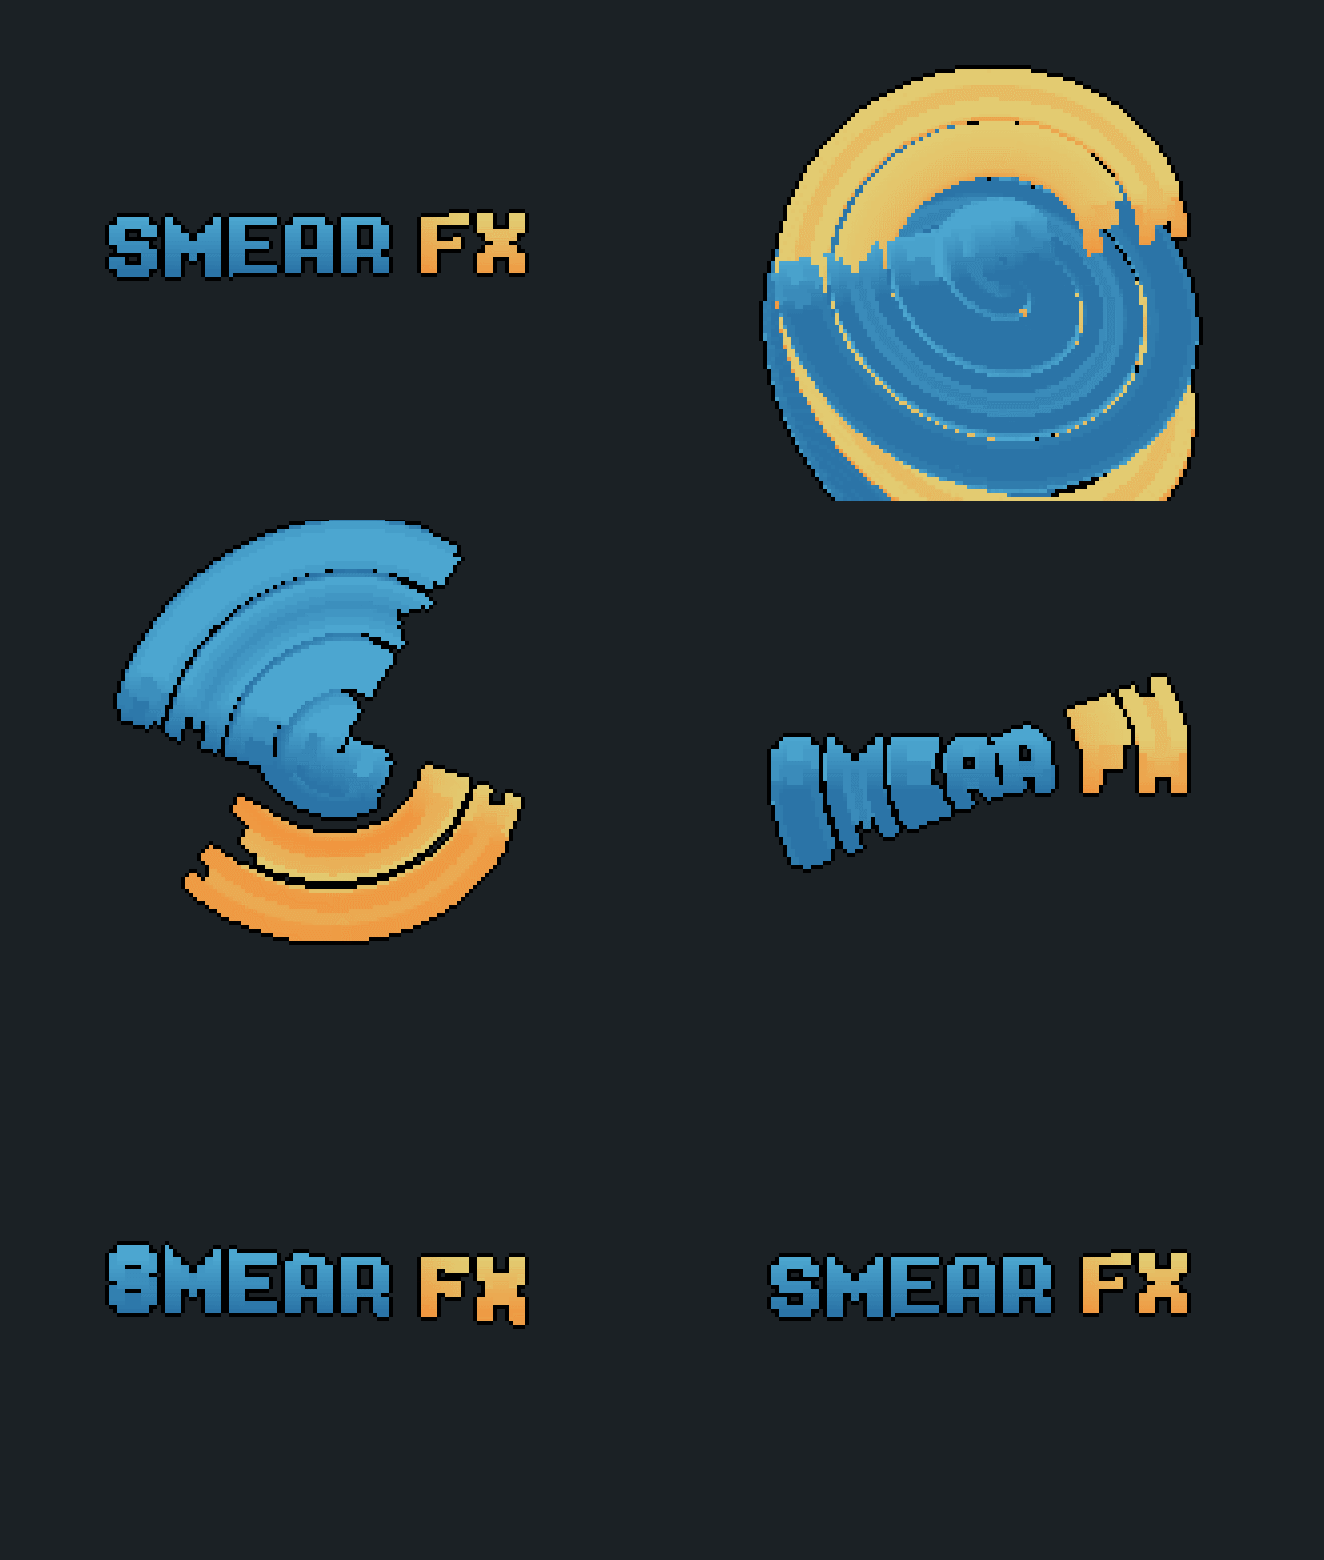
Smear FX ($15 windows)

smear fx example

Works particularly well with sprites, you can quickly add a smear animation to anything. Because this software was (I very much assume) created in Gamemaker it has it’s limitations but I still think it’s a fun tool on it’s own.
This guy makes a ton of fun animation software and I recommend his other projects.

smear fx interface

Juice FX ($20 Windows)

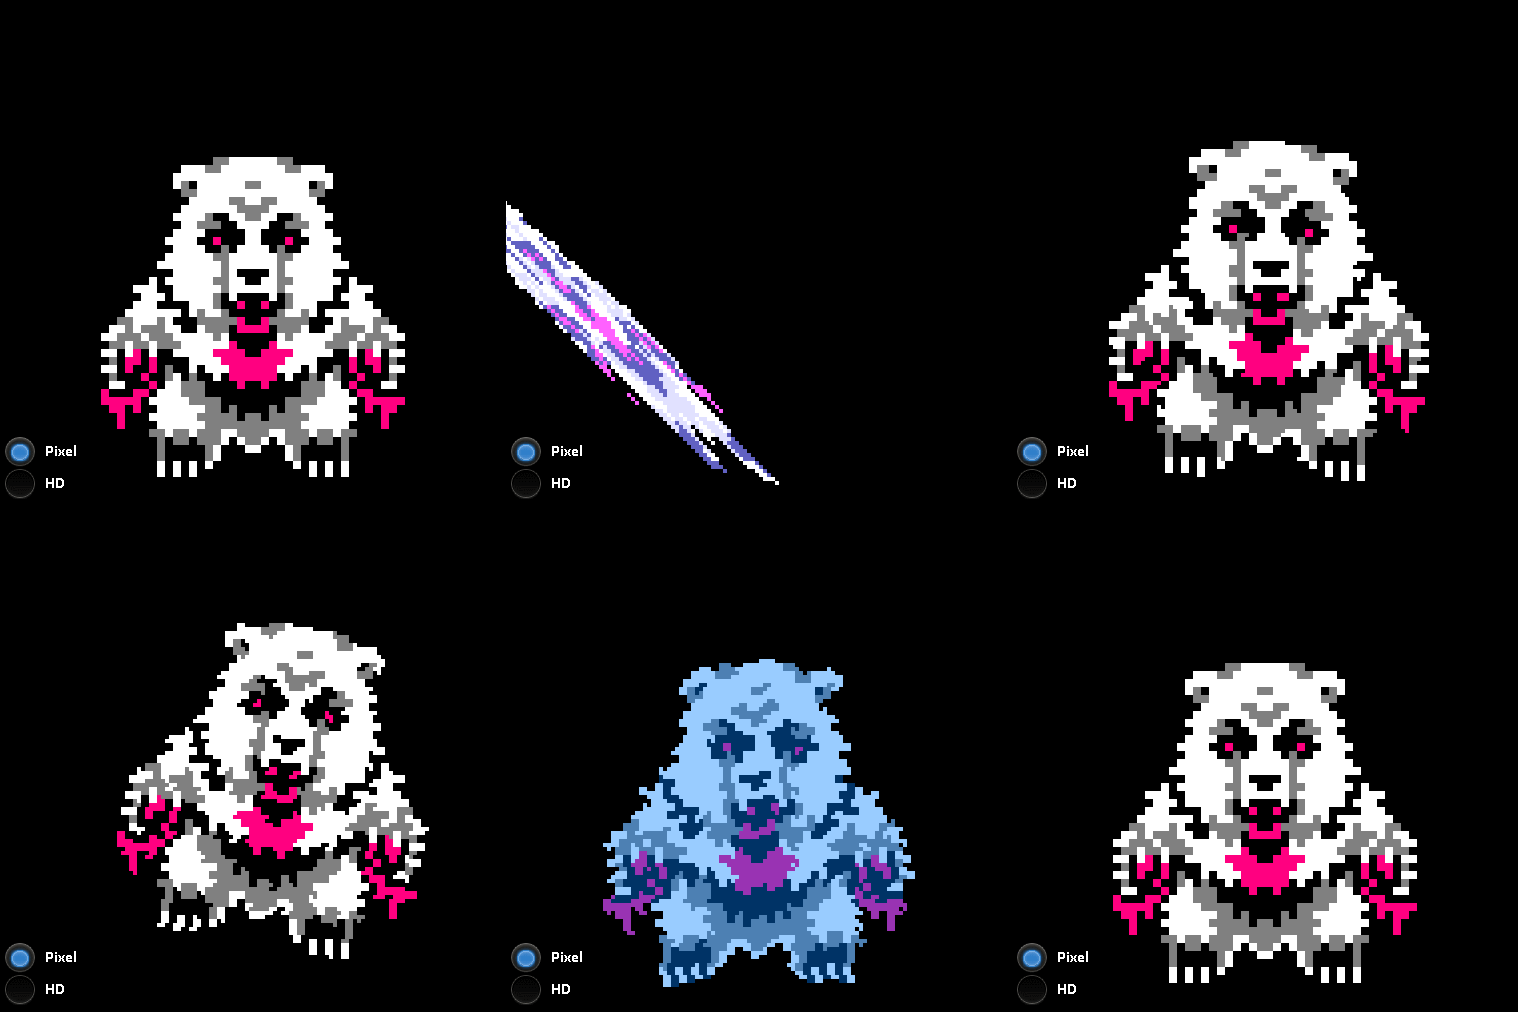
Great for particular animations common in games (Flash, Scale, Skew, Shake, Wobble, Jump, Wave etc), you just load an the image or images and with a few sliders can quickly export a finished animation.

juice fx bear animations
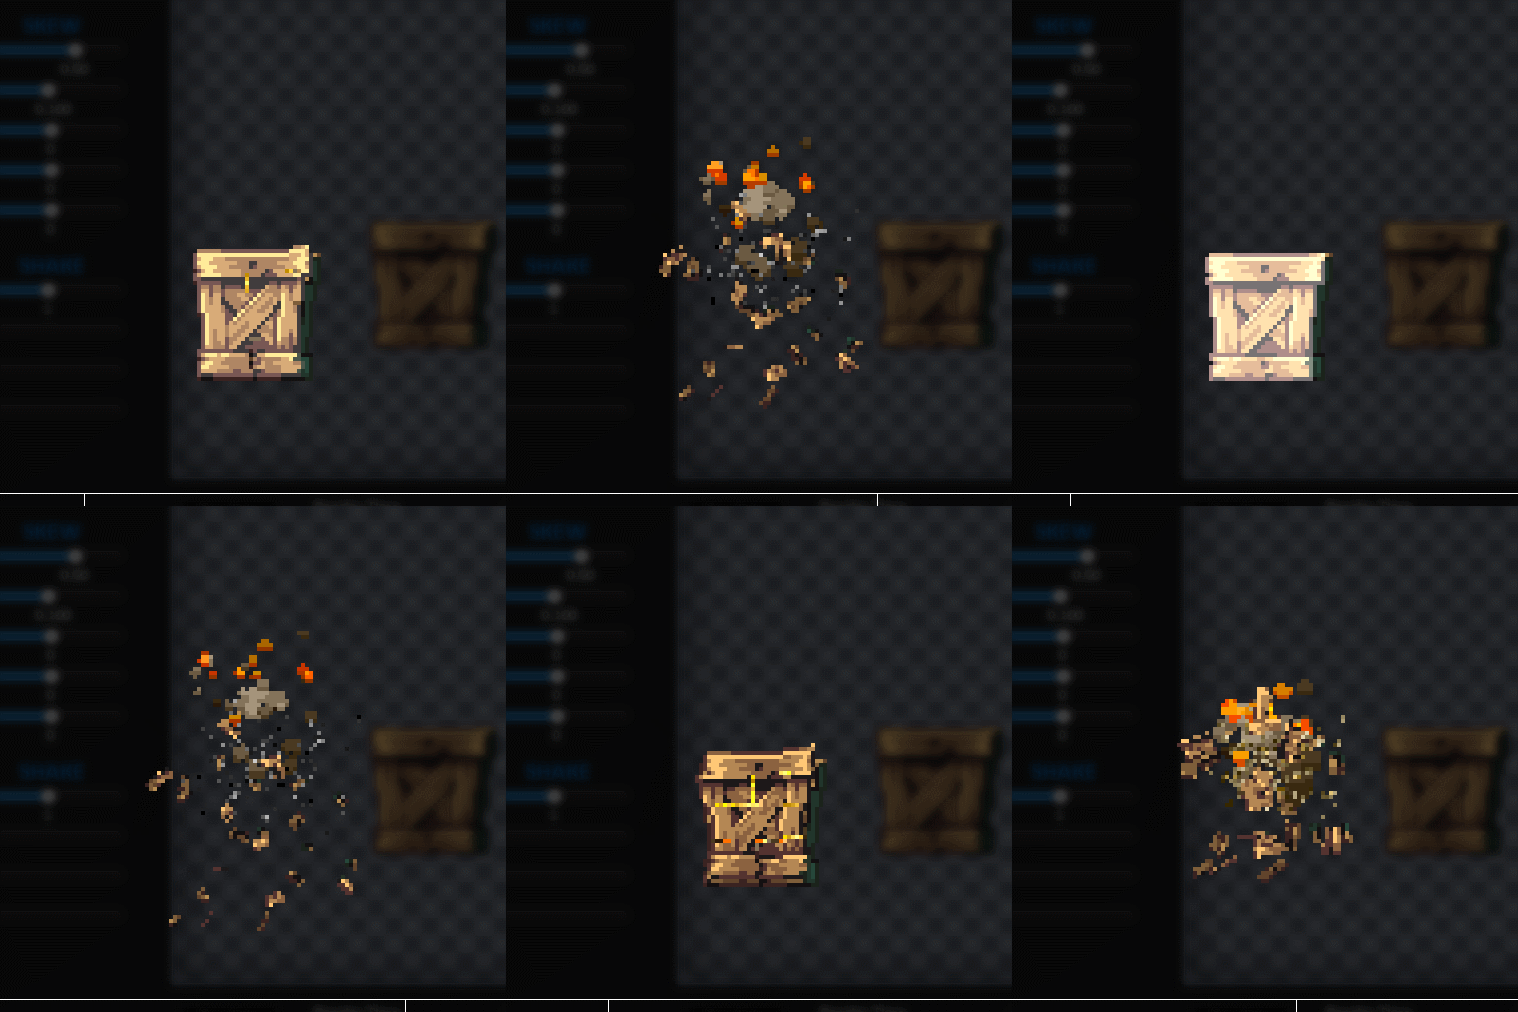
Juice fx destroyed box example

Lots of fun effects and it exports as a spritesheet for easy use. Man WordPress struggles with gifs.. Check the Juice FX page for more.


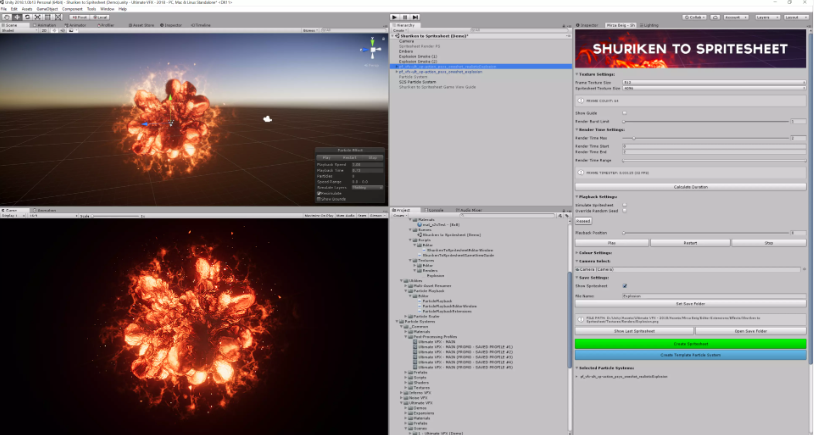
I thought I’d throw in a particle effect to spritesheet tool because Unity is great for creating particle effects. If you ever want to use them outside of Unity or have a particle effect within another particle effect then spritesheets is a easy way to do that.

Shuriken to spritesheet example image

Now of course you can use other software like Blender, After Effects, or more complicated tools but if you want something fast for FX these tools will really help.

My Favorite Desktop Programs

Hello there, I thought I’d share some of my favorite programs and why. This is in no particular order, just wanted to make a quick list. I’m a flexible designer so I’ve worked on a variety of projects and my tools reflect that. This post isn’t sponsored (considering half the tools are free and open-source) or anything just wanted to share some tools I really love.

Here is the list if you want to quickly see what I’m covering.

  1. Affinity Designer – Vector software similar to Illustrator
  2. Affinity Publisher – Publishing & page management software similar to InDesign
  3. Clip Studio Paint – Japanese Comic Software (Supports 3D models, includes 1000’s of free assets, etc)
  4. Krita – free awesome digital paint app
  5. Blender – free 3D/2D modeling/sculpting & animation, video editing and FX tool
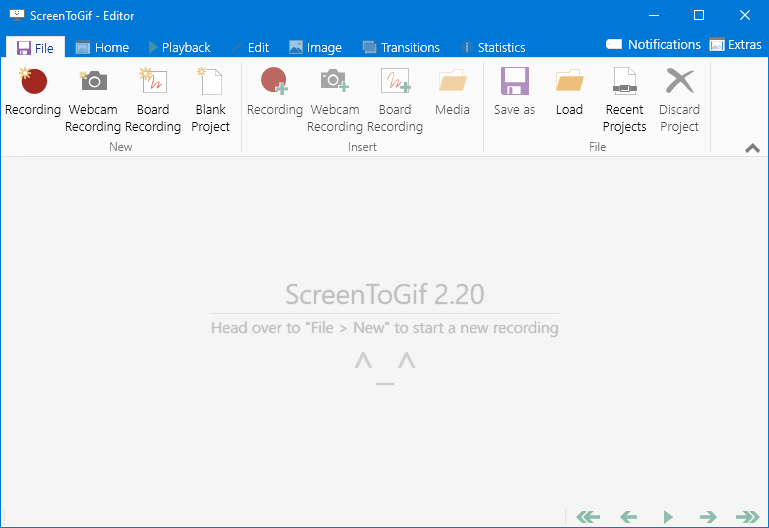
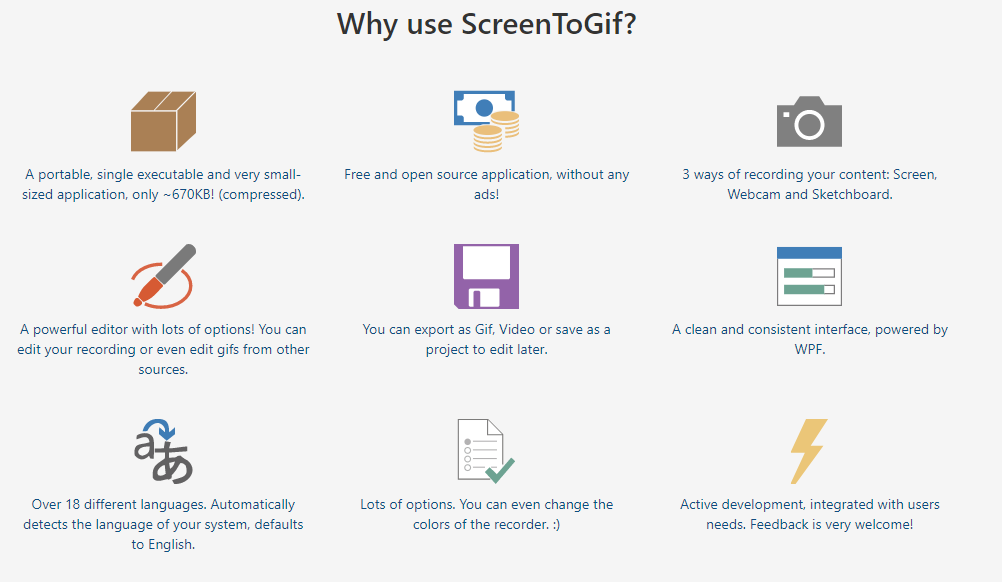
  6. Screen to Gif – record gif or videos with this free editor
  7. Github Desktop – The artist-friendly way to save your work
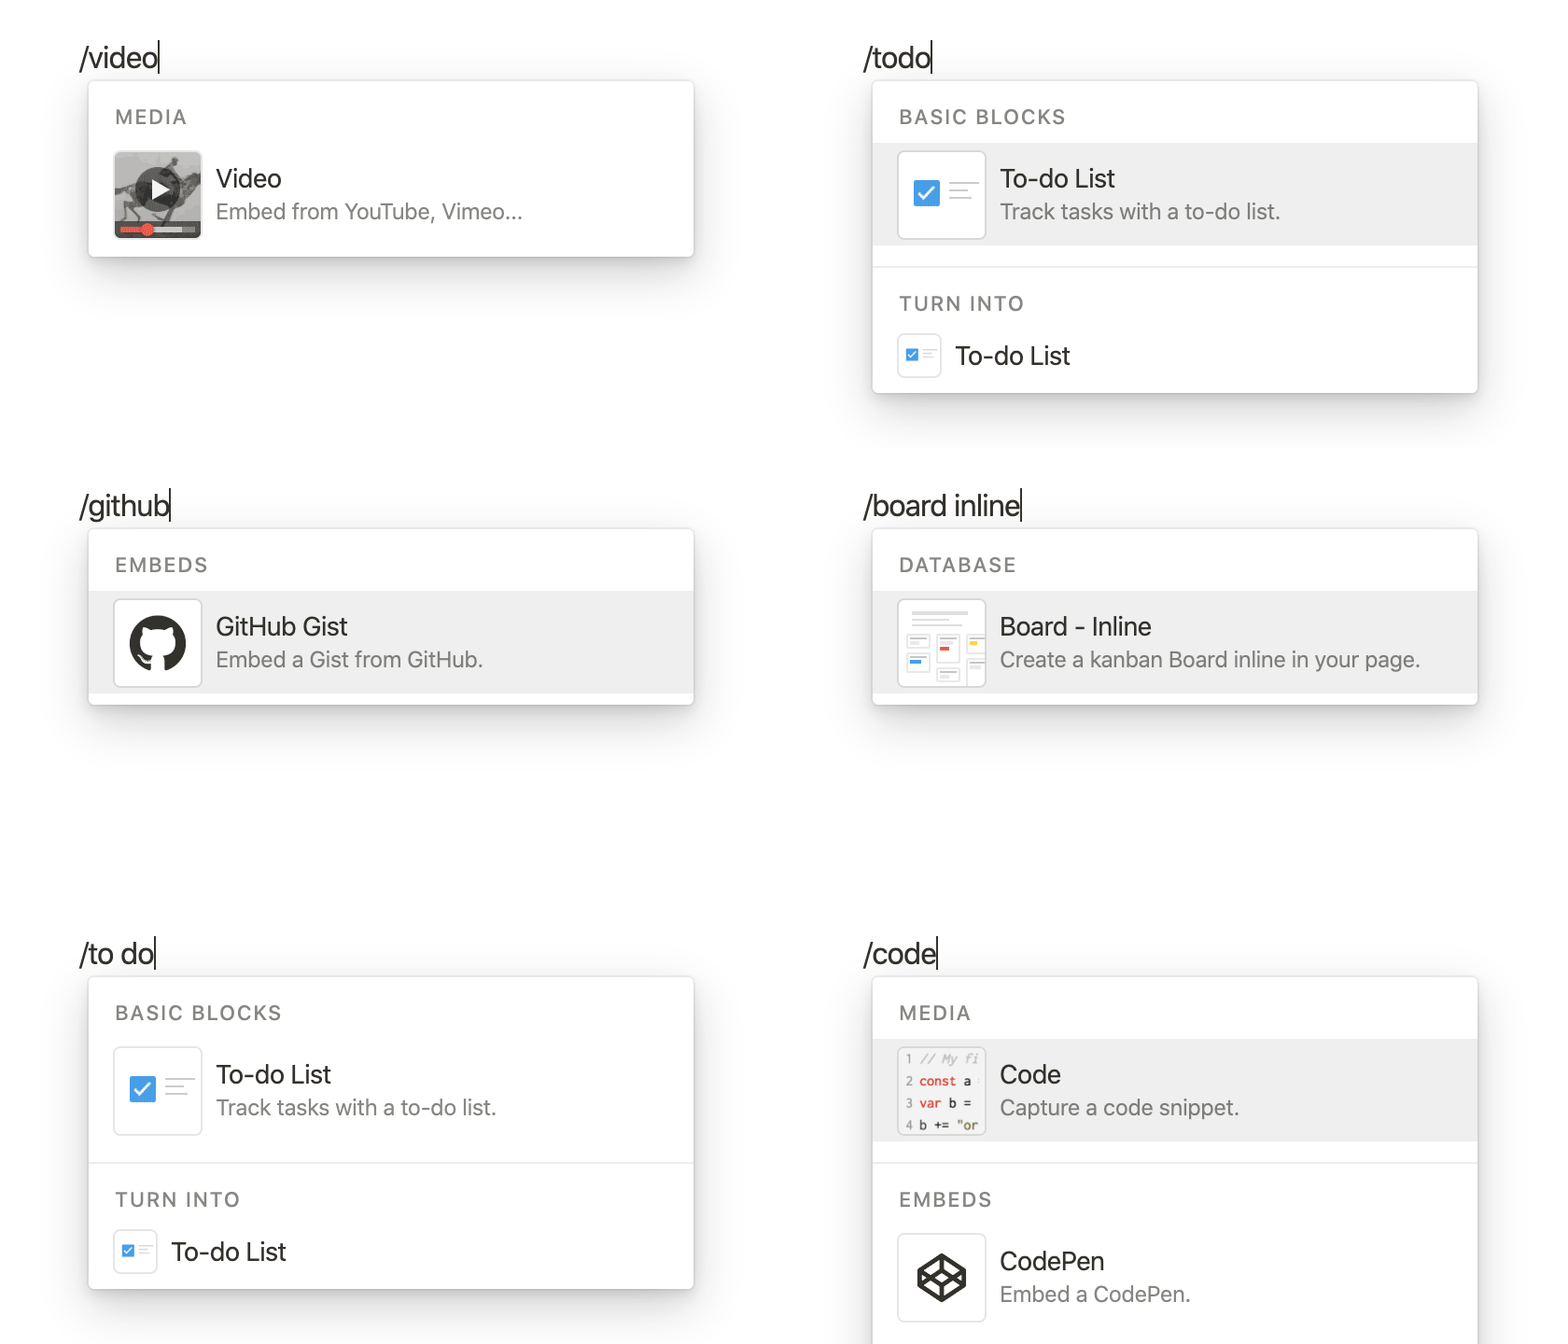
  8. Notion – Kanban boards, tables, lists, Wikis, blog posts, Notes & docs, math equations, websites all in one tool.
  9. Unity – For building games

Runner up tools would be Visual Studio Code, Reaper, FontForge, and well probably some other tools I can’t think of at the moment. I don’t really use these tools enough to add them to this list, but I wanted to give them honorable mentions as a code editor, sound editor, and font editor.

Favorite Design Software

Affinity Designer

A competitor to Adobe Illustrator, for one low price of $50 you can own this lovely software perfect for Vector design work or 2D artwork created from points and paths not based on raster pixels but perfectly calculated curves and lines.

Affinity Designer works on Mac, Windows and Ipad
Affinity Design example of Vector lines on the right and Pixel Live Preview on the left.


Illustrator came out in 1987, and Affinity Designer 2014 (Windows version 2016) and despite the wide gap in years Affinity Design has caught up well and added features Illustrator with its bloated history has not yet received.
The most notable difference is Ease of Use, affinity design makes it easy to get started when working on a design. If you have a few hours you can quickly master Affinity Design.

Some features that Affinity Design has that Illustrator does not is wide file support. Affinity Design also has built-in Persona’s that allow you to easily combine Vector & Vaster images. They also easily allow you to switch a file into any of their software so if you have Affinity Publisher you can easily open up Affinity Design files.

Affinity Design allows unlimited zoom, artboards, undo, and history snapshots. It’s very fast compared to Illustrator but is still missing a few key features such as tracing, mesh tools, blend and knife tools. The filters are lacking as well but for $50 one time vs $250+ per year, it’s worth the price. Many people compare it to CS5 toolset wise which is not bad. My favorite feature would be Power Duplicate which allows me to paste an object at different scales or rotations depending on the last pasted object using Ctrl + C to copy and Ctrl + J to paste with the changes.

Affinity Design alternatives would Inkscape, Illustrator and Gravit… But they just aren’t as good.

Affinity Publisher

Similar to Adobe’s Indesign, Affinity Publisher is available for creating books and print material. It’s easy to use and works well with Affinity Design. I’ve used it to produce three books for print and recommend it as a quick way to work on print production and handle text specifically. It’s still missing a lot of key features but worked well enough for my purposes. Did mention all Affinity software has a spellcheck feature built in?

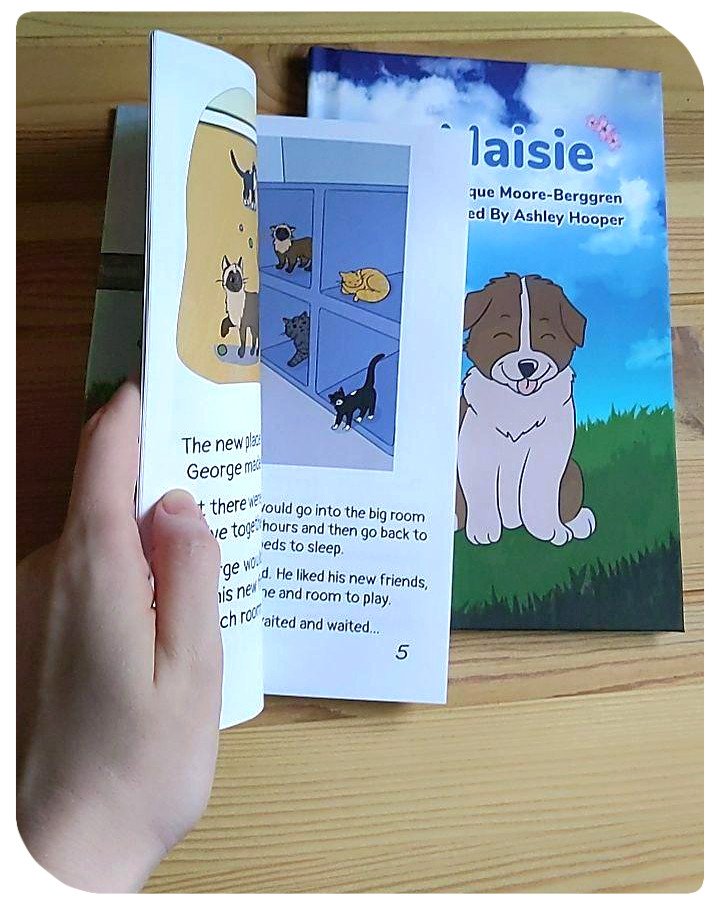
Here are some books I made with it.

While I could mention Affinity Photo, I still have found Adobe Photoshop to be better overall and haven’t seen a killer feature from Photo that would make me switch but I hope in the future they find a way. I’d like to completely get rid of Adobe at some point.

Clip Studio Paint

It’s built for professionals. If you are looking for a tool that allows you to create comics, books, animations, or anything focused on illustration with a vector attitude this is the software for you. They have an incredible free & paid asset store (Also as an American, the store is super cheap! $20 will last you a good while), amazing brushes, backgrounds and other tools. I recommend this software for artists who are into animation and comics. The downsides is because it is a Japanese product be prepared to work out translating some stuff on the asset store, they have a button to do it for you, but when searching its still good to know to look for 枝 instead of branch as you’ll get better results with the former.
Check it out

Above shows vectors brushes, perspective & ruler tools (they have some amazing tools!), 3D models used to help aid with drawing (I mainly use them for background work) and page management. I think the page management could use a little work but overall it’s great, I use affinity publisher for better page & text management though.

They also allow animation and stuff but the tools are only so-so if you ask me.

Krita

Krita is a great free digital painting & animation tool, it has a lot of special features not found in other art engines. What I use it for most would be it’s filters. It has both Internal and G’MIC filters. And those G’Mic filters! 500+ available filters! It also has the most non-destructive workflow for artists with so many different types of layer options. The reference tool it has is really nice, I wish other companies built something similar. It also has your standard Drawing Assistants, Full Color Management, HDR Painting, Python Scripting, PSD Support, Audio Support for Animation, Customizable onion skinning, and so much more!
I love the how the brush was built to be both a brush and eraser, the Brush Stabilizers are good, as is the Brush Engines, it also has a Wrap-around mode for creating tiles/textures/repeat patterns. 🙂 Great for game art!

How can you not like their cute mascot too?
Use Krita to create fun Animation
Tons of free resources on producing comics for web & print
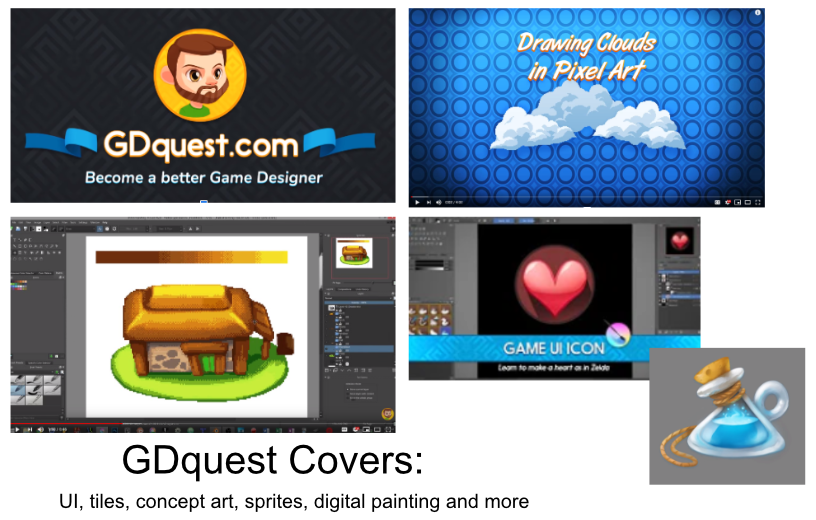
Check out game art resources with GDQuest

Blender

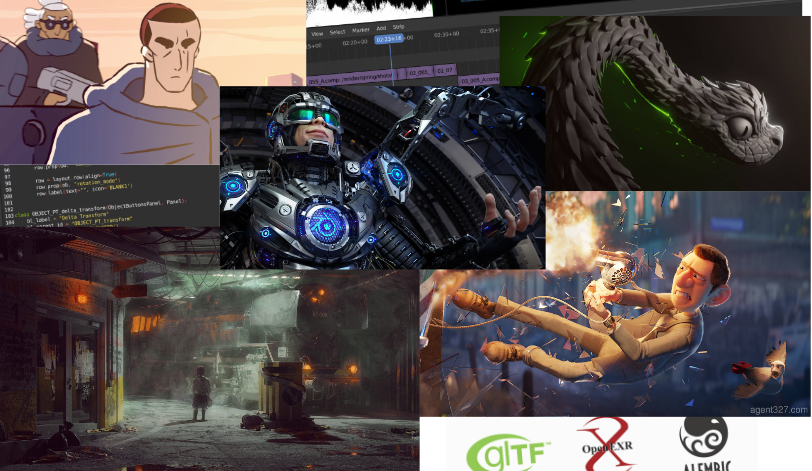
Blender an all in one tool – 3D modeling, Animation, 2D animation, Video compositing, VFX, Shaders, Sculpting, Python scripting, all in real time. No need to wait for rendering! Not with EEVEE! Super easy to use and work with.

If you have worked with other 3D modeling/animation etc tools, they made made it easier then ever to transition so it’s a great time to try it out now. I use it for a lot of different projects and recommend it if you want to get started with 3D modeling.

So much packed into one free piece of software!
Lots of short 1 min tutorials which you can pick after working with Blender for a month
See, that was easy! 😉

Screen to Gif

Easy to use free open source screen recorder! Check it out. I use this all the time when I want to quickly create a video or gif of my work and sent it to my client, my friend or whoever else. It’s very easy to use and I enjoy using it. Being free is also a big plus. You can record and edit very easily and I wish I could more software that was quite as nice.

Even has a handily editor so you can trim, draw, edit, play etc
I just realized I could export video… ><

Github Desktop

Yay! Source control! Once you understand source control you will never go back! Github Desktop makes it easy to get started. It’s great for working in games as you can upload your files, makes some tweaks, upload it to the server – realize you made a mistake and revert back. 👍 … Or you can zip up your file, make a terrible mistake, and unzip that last file you saved because you made a back-up the old fashioned way.

In all seriousness it’s like the ultimate undo button with comments and notes, the ability to use branches so you can experiment with files before committing them to the repository. And it’s simple enough artists can use this with Unity, or Love or whatever framework/engine/library you want to work with. If you find yourself hating Unity Collab with hair pulling wait times, you’ll love this, skip the wait, have a better history and work without fear!

Notion

Notion. For those of you who are like, man I wish I had something like google docs but like better.. Well this is for you! Make your notes public websites, or make your spreadsheet private, make it easy to share or hide it away.
You want checkboxes next to your spreadsheets and an embedded pdf? They got you covered!

I like the whole Customize Everything part and the Embed your current tools and drag & drop and just the stuff everything in one spot philosophy. I also like the endless templates available… Not that I really use them much but I like that idea. You can use it for Kanban boards, tables, lists, Wikis, blog posts, Notes & docs, complicated math equations, websites and your own private recipe book.

It’s free but I ended up liking it so much I have the $5 plan for unlimited space.

Unity

My go-to game engine. Before I used Unity, I used GameMaker for many years. I loved GameMaker and it was built well for 2D games. I created art software in it and other games but it was limited in that it could not handle 3D very well. I started teaching myself Unity once I got to the point I wanted to understand 3D. I struggled. I hated Unity, in the beginning, I was overwhelmed with C# the first year but eventually figured it out and now C# is my favorite programming language!

I prefer Unity over Unreal mainly because it’s easier to program in right away and because it runs on low end machines better. If you are looking for something more high end Unreal would be the way to go, but if you just want to make Switch or Mobile games, Unity is better suited.

Designing Good UI/UX is Hard

For those looking for a brief UI overview for small projects, a UI Stylesheet works alright. It’s not as fancy as a full on style guide but for smaller projects it may be what you need as you work out different UI ideas. If you are working on anything longer then 2 weeks, I recommend building a style guide or else you will very likely suffer.

  1. Having a style guide gives you a clear vision of why you made these decisions, this reduces debate.
  2. It’s nice to have a document to refer back to 6 months later when you aren’t sure what size this box was or what color you used on an icon..
  3. You have guidelines ready for if you add new teammates!
  4. I personally think the history of the design is an important aspect to add to the guide unless you can expect the specs and requirements to never change on the project.
  5. Creating a guide alongside with UX reasoning also helps you understand why your UI is laid in the way it is.

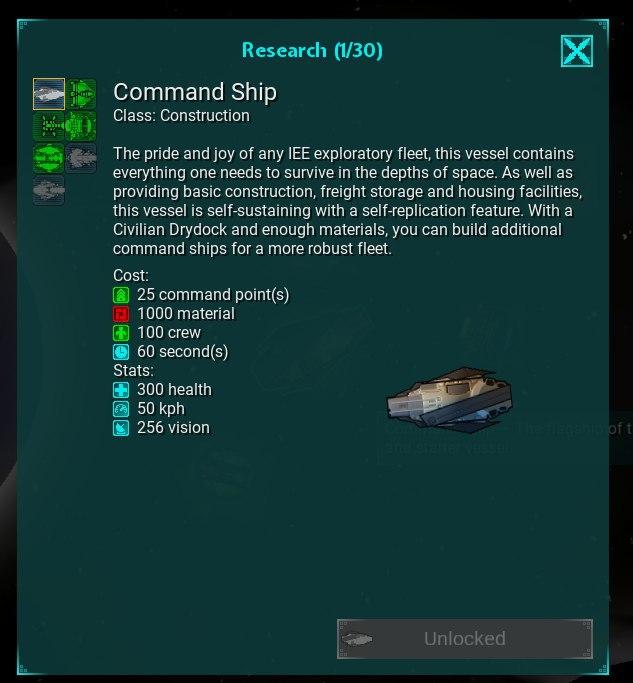
While working on Roguecraft Squadron (An RTS computer game) I went through many many many many different versions of UI. It was hard for me to see the big picture or what direction we should go in because the gameplay was not fleshed out all the way. Another issue was the speed of development. Originally this game was built in 3 days so the UI was choppy and very light. I didn’t know back then about better ways to think about development.

I did not know how to design for long term projects and that made designing UI very challenging.

Original 3 day game prototype. All art above is my mine. Photo from Feb 2017

I was thinking after the 3 day game jam, since we were so successful, we should continue development on the game. We continued to do so and did user testing at a local game meetup’s among other places. We would have people play and we would try to figure out ways to improve the game and make it more fun. While our user testing with formal experience was limited, we made the best of it. We would basically sit a user down and watch them play and ask them questions were they struggled.

This was April 2017. We tried to add in a tutorial, it would be a few more years before we figured out how to do it right.

I was still learning how to create UI during this process, and things such as 9 slicing. Since this was built in the LÖVE Framework it was much more restricted then something like as the Unity Game Engine that has a interface I can work with. While I could build designs, the feasibility of designs was limited because of time constricts and limits within the framework.

Me fiddling about with 12 slices here…

Now as I worked on changing UI throughout the process I realized had we just decided on a style and covered constraints early on it would have saved a lot of frustration in the process. Towards the end we ended up stripping out any fancy effects I had in mind and keeping it very basic so we could finish the project.

The UI in the end – Feb 2019. Very stripped down and purely function over style.
This was further worked on, as you can see the ship now had a selector, and the layout was overhauled
Now you might ask yourself what is a stylesheet?

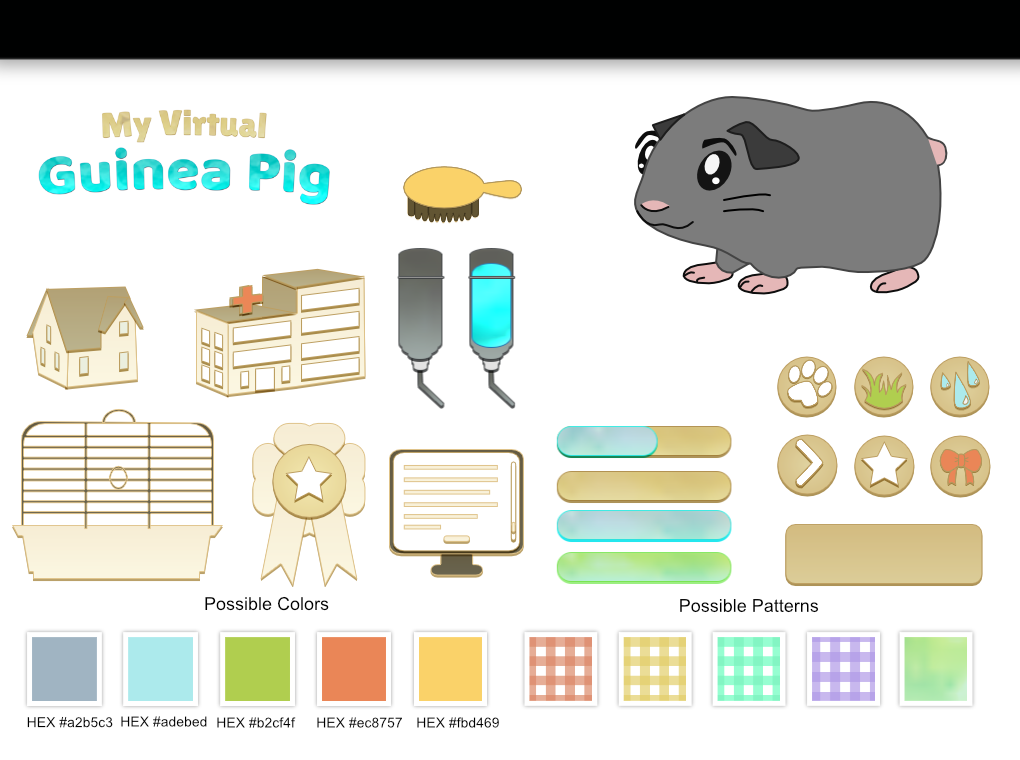
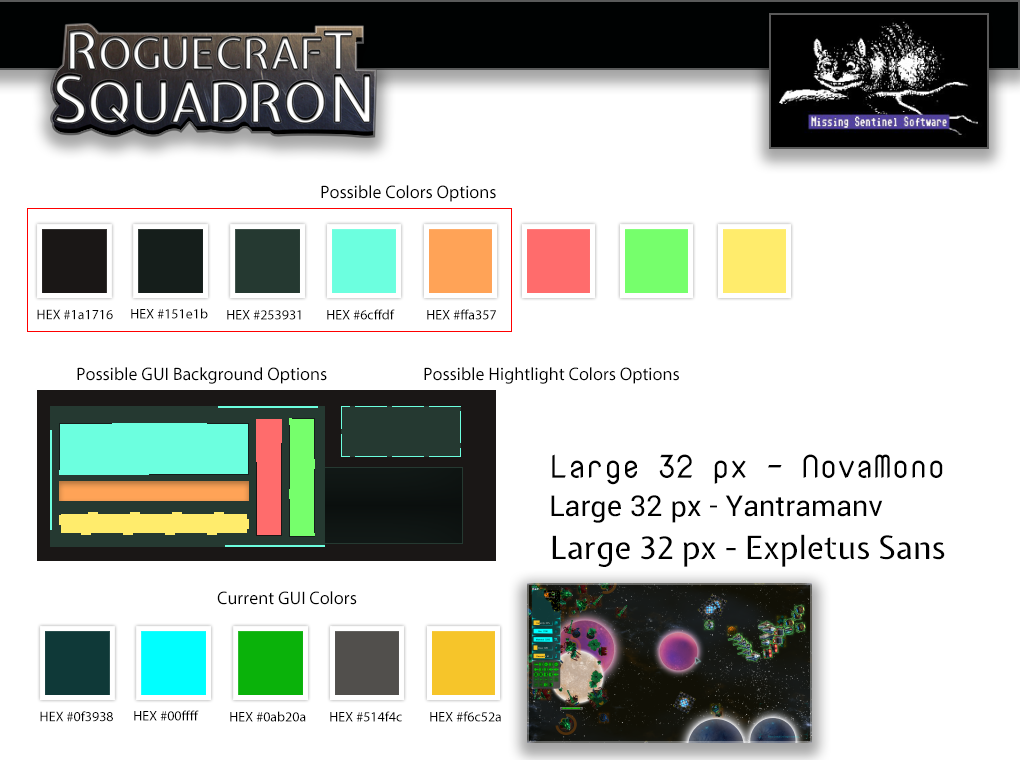
A stylesheet is a way to glance over all your visual elements so you can see if they work together. I can’t remember the original creator of the this PS stylesheet template but I liked the idea. It was a way to quickly compare elements and see if they worked together. A quick mock-up so to speak. The idea is to test colors, patterns, fonts and other styles together to see if they work together. You can then create different styles and compare them.

Here is an example I made of a stylesheet for Stellaris. I was not part of the team this is just an example.
Here is an example I created during the pre-production of a game I was working on later on.
Here I was trying to make sense of what the game had become!

Well near the end as we decided to overhaul the UI to a simple version then I went about trying to make sense of the UI. At that point colors were random and did not work well together and things were becoming hard to understand, the other problem was we introduced new artists that didn’t understand our UI guidelines (Maybe because we didn’t have any then??) so the art we received was completely in the wrong style. If you work on a project for a few years without proper planning – original designs and plans get muddled. Sometimes the worse thing you can do is continue to try and improve something in your current direction.

What I would recommend if I were to fix this – Ask 3 important questions

  1. First separate out the elements, compare them to one another. Do the UI elements feel like they fit together? Do they all share similar styles, sizes and color schemes? What doesn’t fit? What does fit? Does spacing and size feel right? I feel that spacing and sizing of our UI could have used work. As the art we received from two new artists did not fit but I couldn’t argue that out of the project as it was already commissioned for and we didn’t want people to feel bad.
  2. Second, can you tell what the theme is from the color scheme? Why are the colors chosen? What is the meaning behind the colors? I think overall our UI colors worked but could have been more focused.
  3. Third – do the elements themselves feel like they belong with the rest of the content? (The game in this case). In the last version of our UI I would say no. The rest of the game is detailed, but the UI is strangely not. It doesn’t feel connected to the world in my opinion.

Using this process I believe we could have worked out a UI that felt better connected to the game.

There were numerous time constricts with the design and what the programmers could do so sometimes you just have to let it go and just find doable fixes the programmer will okay for your deadline.

If you want to see behind the scenes on some of the ideas for the UI why not look at the notes on GitHub?

Here you can see the crazy design process on RCS. Design is messy, frustrating, and getting a win like getting the programmer to add a UI back button can really feel like a victory (I mean I really fought for a back button on all the main screens, it was like not until we were going to release 2 years later we added one).

Here you can see my journey of learning how to write better tickets, create better designs, and figure out better project management. Lots & lots of mistakes but I slowly learned how to improve. Not everything is here but here are a few examples of stuff I’ve worked on.

I never claimed to be a good designer and I sure learned a lot over a few years working with designing screens. What I learned most of all is…

Use a style guide next time!
A part of me would like to write a guide on a style guide for RCS sometime when I have more free time. Considering this has been a pet project for so many years, it’s nice to work on in my free time but I always have so many other projects going on, we’ll see when it happens.

Getting started in FontForge!

You can download it here.

Getting started

Hey, I thought I’d make a very brief tutorial on creating a font in fontforge, for more advanced tutorials I highly recommend this kid on youtube.

To get started install fontforge. Now by default FontForge wants to open a font, but today I was going to cover going over a font from scratch. It’s still a good idea though to start with a base font then modify from there, but for today only I was going to cover some of the most used characters.

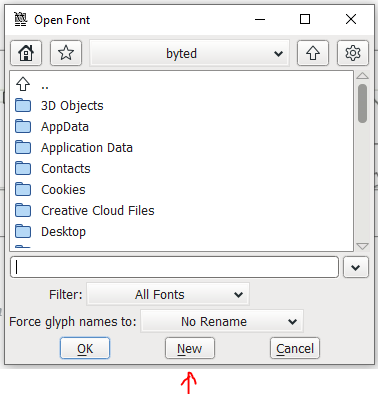
Hit New to Get Started

Starting a font from scratch, instead of opening a font

I started a font with the New button instead of opening a font. You’ll notice the first 32 characters are strange looking. I’ve marked them below.

Font sections are divided into 3 parts or more.

The first few characters in a beginning of a font are reserved for font formatting and other functions; they are called Control codes. These characters are used to check when a file ends, how to handle backspaces, what to do if the font errors out etc. They are basically directions so anything that wants to use this font knows how. For a little more info you can look at each characters function here.

The 3 parts to a font are control codes, basic Latin, and a supplement

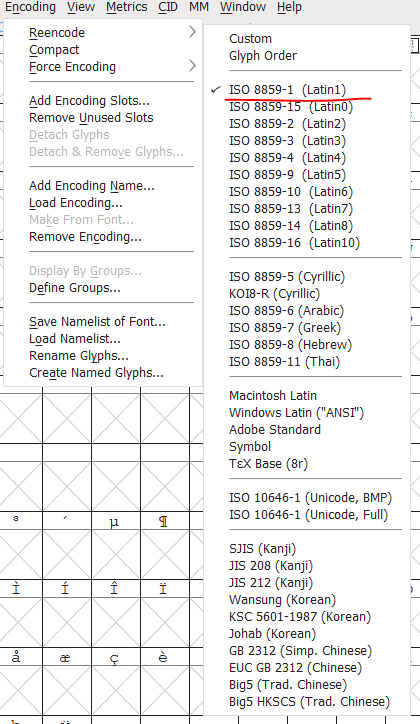
Now the next thing I’ll point out is this font is encoded to be a generic Latin based font, if you wish to use a different language you can change the encoding to some other format. Changing the encoding can change the basic latin and the supplement characters/symbols included.

Encoding > Reencode > other code option

No manner what you form of Latin you switch to, your basic Latin (The top section) will remain the same, the bottom section will change depending on how you encoded it. Switching to encoding to some other format outside of Latin such as SJIS (Kanji) will also change some characters in the basic Latin section.

If you need to use a particular character or language look for it here and ensure you have the correct encoding.

Now your big focus should be on the most used characters, in this case Basic Latin (the top section), the supplement characters aren’t important unless you need special characters such as ©, ±, £, ½, Â for example.

Creating a character

Find a character and click on the box below to work on modifying it. If it has an X in the box it merely means it is empty with no data. We’ll need to start filling this in.

Now to open a character double click on the box below the character to open it.

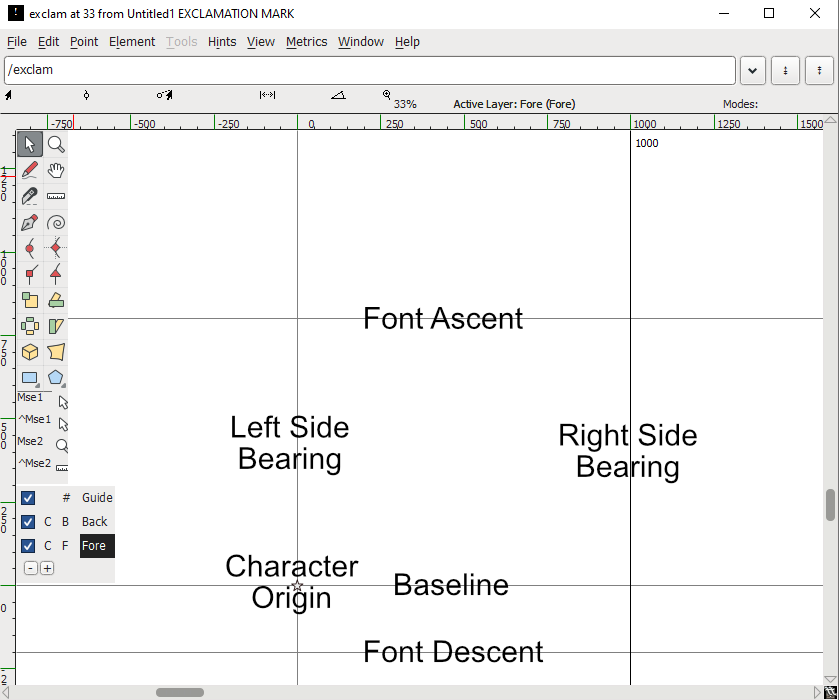
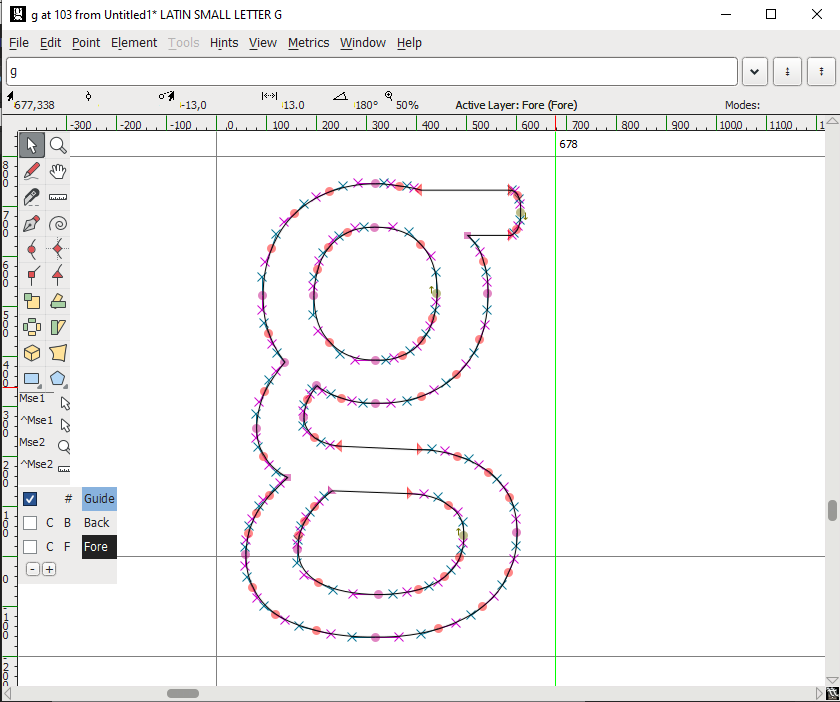
Here is the Outline Glyph View, this is where you will be able to edit or add glyphs.

Let me break these terms down in real simple terms

  • Font Max Ascent Line – The highest point of the font, anything above gets cut off or starts to overlap another another character
  • Font Max Descent Line – The lowest point of the font, anything below this gets cut off or starts to overlap another another character
  • Left Side Bearing – Anything further left gets cut off or starts to overlap another another character
  • Right Side Bearing – Anything further right gets cut off or starts to overlap another another character
  • Baseline – This is where the base of your character sits, characters like Y or G will often have descenders that fall below a baseline.

Importing an SVG

One of the nice things about fontForge is it allows you to easily import SVG, bitmap and other file types you can use as a font. SVG or vectors will be clean and clean nicely, other file types may cause other issues.

To import an SVG you can go to File > Import and select the file where ever you left it last.

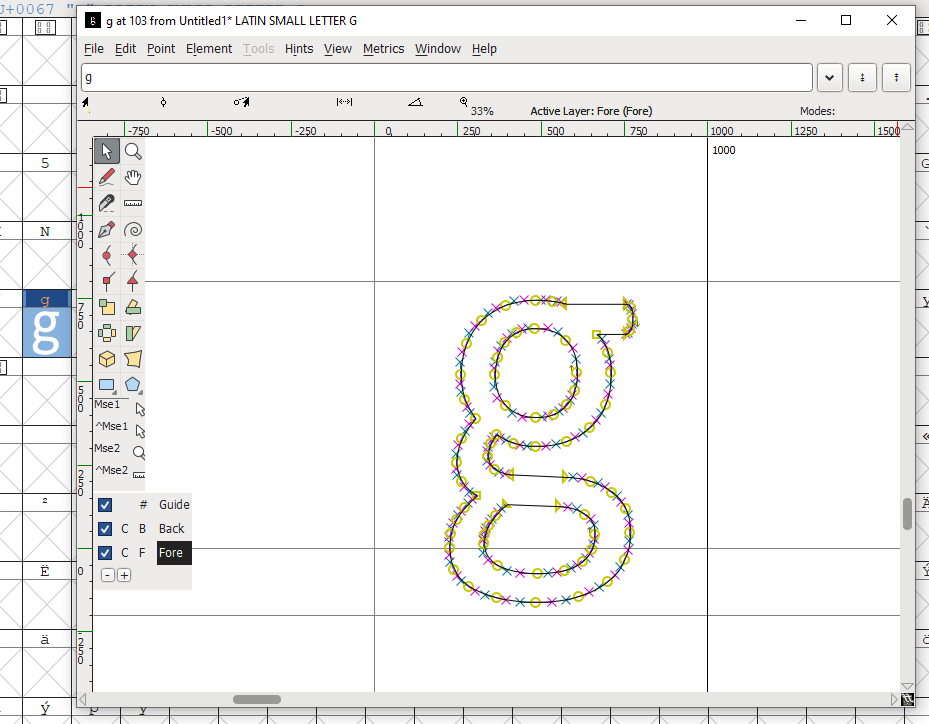
As you can see in this example the g includes part of a descender that goes below the baseline.

You can adjust the bearings by clicking and dragging them, this removes unused space.

Quick drawing help

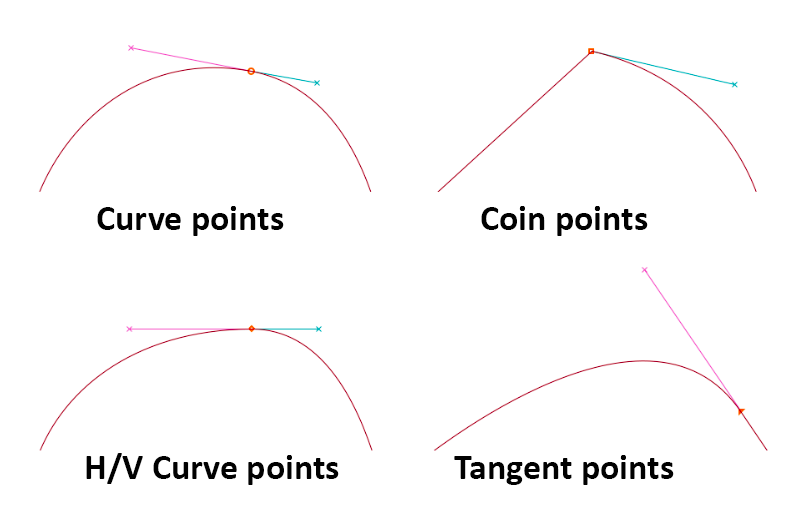
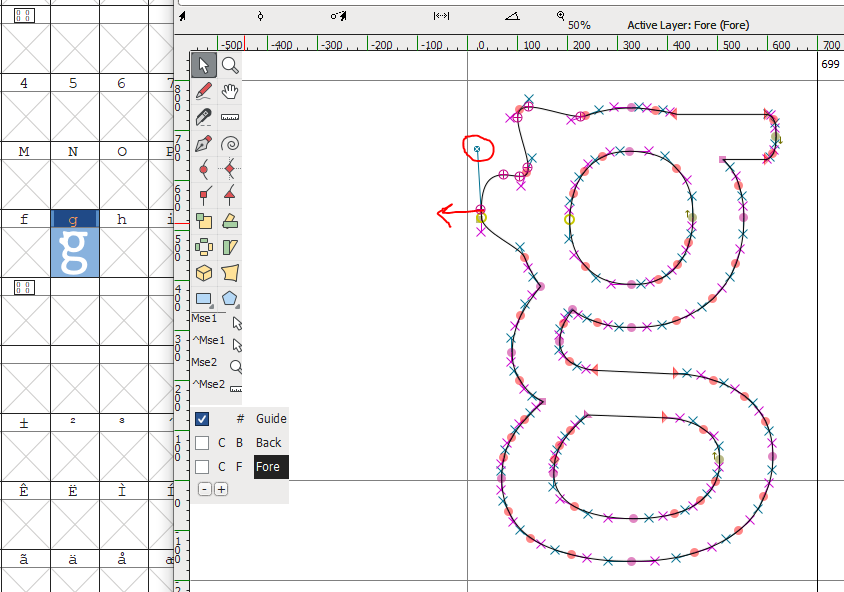
Now if you want to create your own character I won’t go into a lot of detail but will give you some pointers. A character is full of points, these points can be made into different types of points- Curve points, H/V Curve points, Coins or corner points, Tangent points. These different types of points change what you can control on a curve. You can check out the manual for more info.

Try to click on a point and drag it out. The o’s are a point and the x’s are an anchor used to control the point.

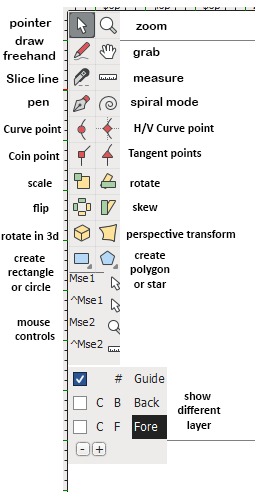
I created some lazy names to make the tools easier to remember

I’m not going to go into what these tools do. Experiment and play with them. But let me go over three more important points.

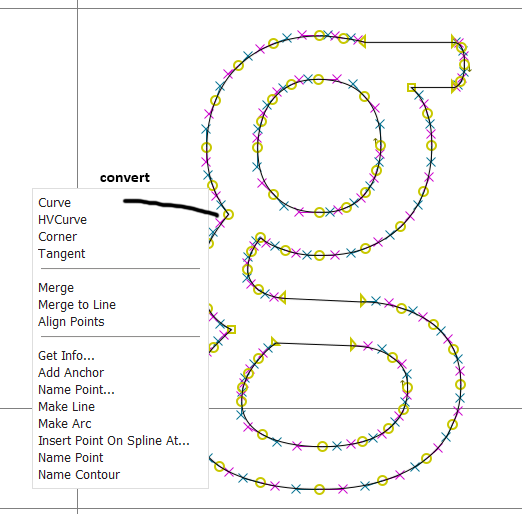
1. right click any point to convert to a different type of point.

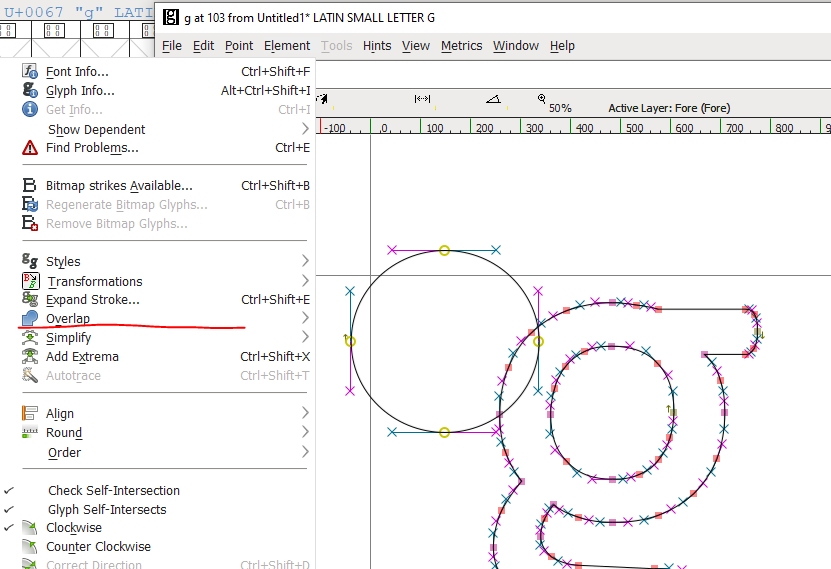
2. Go to Element > Overlap to change how shapes are combined or intersected

Intersect examples

3. Check what clockwise direction a shape is facing to see if it’s visible. If it’s the wrong clockwise direction, it’s invisible.

Extra tidbits – Coping & Pasting Glyphs

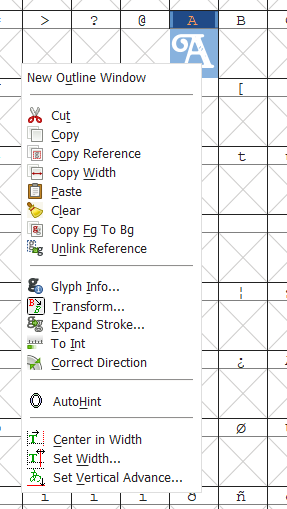
You can copy & paste letters really quickly just by right clicking and pasting on letter and selecting a place to paste. This also a quick way to clear glyphs too.

Extra tidbits – Changing ascent/descent lines

You’ll notice the Max Ascent Line and Max Decent line can’t be dragged as this applies to all characters. To change this you’ll need to exit the letter and return to the main screen from here go to Element > Font Info.

Extra tidbits – How to prepare an image for import

Some quick things here, the default max height for a character is 1000 pixels. Width doesn’t matter as much as you can adjust the bearings easily but a good starting point is creating a file 1000 x 1000 pixels in whatever software you choose – be it Affinity Design, Photoshop, Illustrator, Krita, Inkscape etc whatever.

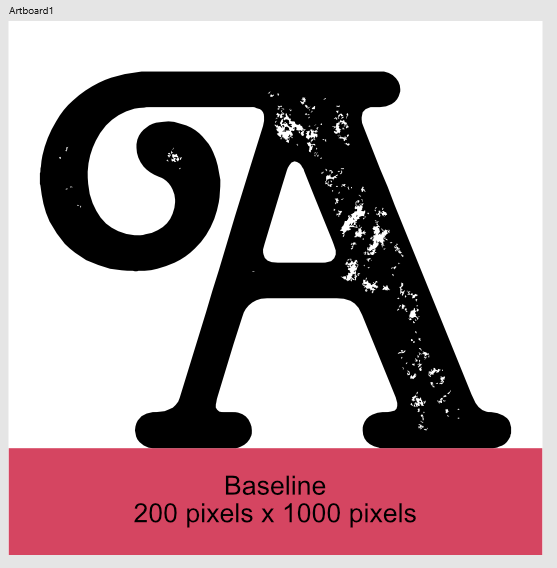
Here is an example with a Bookmen Press Serif character.

Your baseline is general 200 pixels from the bottom of the image. You can use a rectangle for something as a guildeline and just remove it when you export. I’d probably start with an open source font from Google fonts, free and open source is a great starting point.

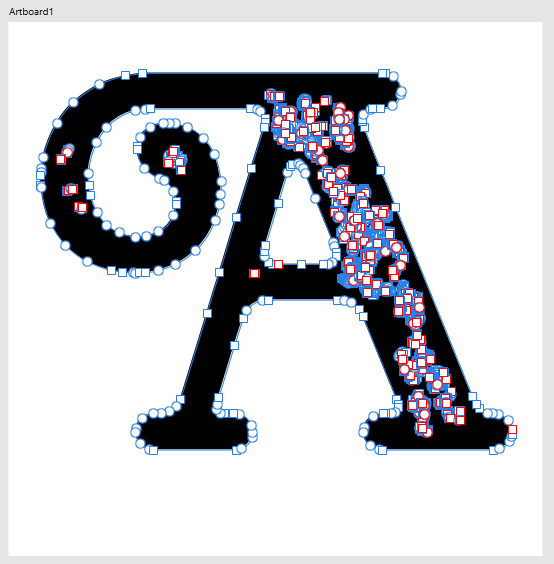
Here you can see the character imported after the letter was converted to curves in Affinity Design.

Extra tidbits – Exporting a font

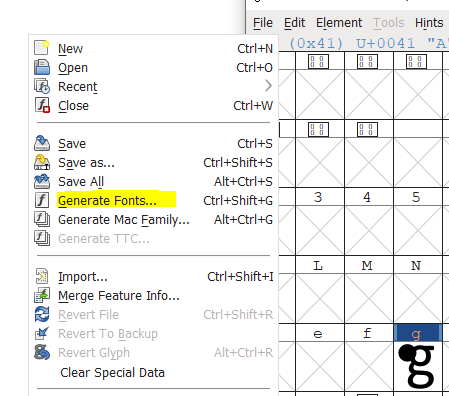
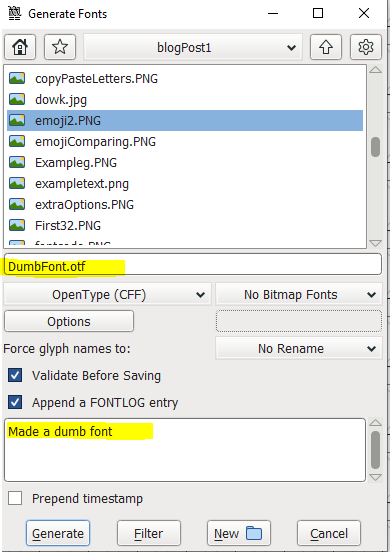
You can quickly export a font with File > Generate Font.

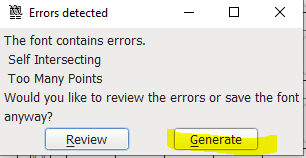
As long as you don’t have any big errors this should be fine.

Here is an example of the dumb font I created for this tutorial

Using Emoji Fonts in Affinity Publisher

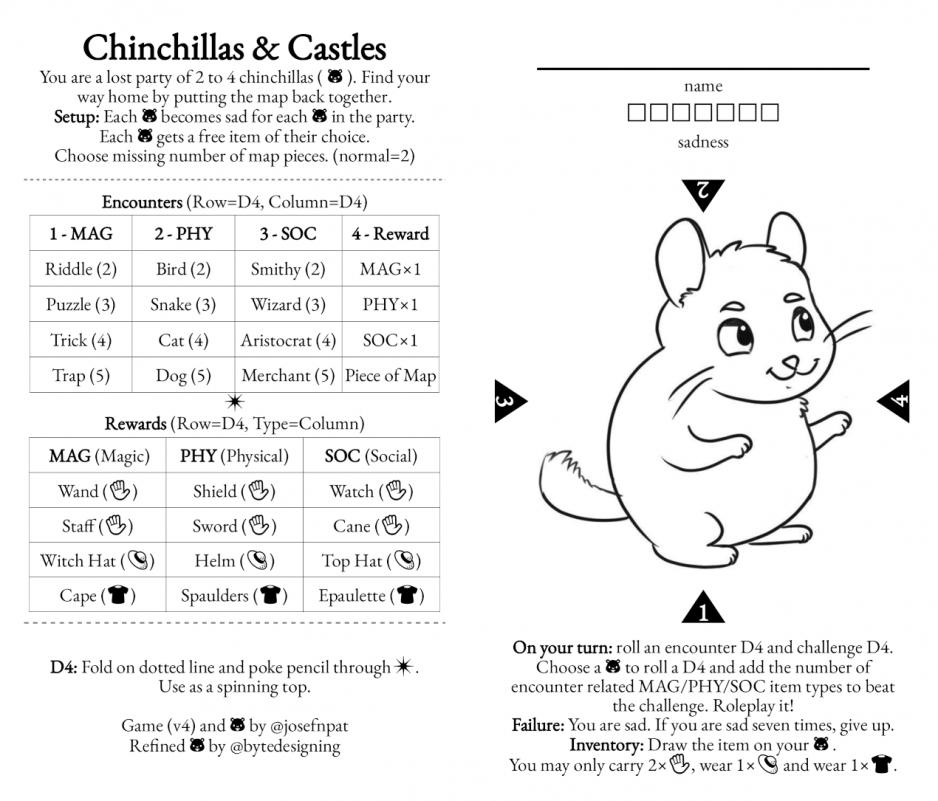
Play this game I collaborated on here. I go by bytedesigning in other circles.

Why use Glyphs and What are Glyphs?

Won’t it be nice if you were designing a project and decided you wanted to use an icon or symbol instead of typing out a word (to save space or improve understanding, etc) perhaps an icon or emoji for a flower(🌷)?

This is where software that support’s font glyphs really shines. While fonts like these are often rereferred to as decorative fonts or image based fonts they aren’t always. They may just be regular fonts with added characters, symbols, or ligatures. What are ligatures you may ask? Ligatures are combinations of letters that result in a fancy and stylish version when used together, they also reduce the space of two characters into one.

These two letters are combined to form a ligature and new glyph

The most common ligature you likely use everyday is the ampersand (&) this symbol is the Latin conjunctive word et (e + t) which basically translates to “and”.

How Do I Get Glyphs?

I already wrote a brief post earlier about different font file types. This is important because I’ll be focusing on the OTF file type, a font type that allows the use of emoji’s because of the powerful glyphs support. TTF and PSF has very limited support for extra characters like glyphs and while currently Photoshop and other Adobe software support SVG type fonts they have numerous downsides such as scaling and resolution support issues – to use a “safe” font that does not suffer these problems I stick to OTF. Due to TrueType being most compatible most fonts are still being created in ttf and the largest in the world – Code2000 (20 years old now and now abandoned) is still a great starting point for emoji fonts particularly for kaomoji later referenced in this post. Code2000 even includes unusual glyphs for Klingon and Cirth and others. In total the code2000+ fonts have around 90,000 glyphs all created as far as I know by James Kass.

Affinity software, Adobe software and most other software that supports glyphs works well with OTF and such is a safe bet. So if you are looking for good glyph fonts look for OTF & TT fonts for the best range of characters.

Where can I get an emoji font?

While currently emoji fonts are limited in the sense there are not many fully supported fonts released for free almost every operating system (OS) at this point uses a custom one. To see every OS system emoji font you can check here and compare them at Emojipedia.

If you want to download an emoji font I suggest Google’s emoji font Noto (Noto Emoji) or OpenMoji (Despite those both being TTF). Most other emoji fonts don’t seem to have a lot of support right now…

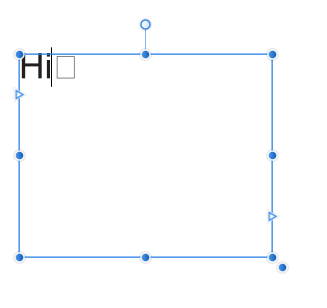
You may find copying this symbol into a text box doesn’t work though and ask yourself why not? It works on Firefox or Microsoft Edge or Google Chrome etc. There are two reasons it won’t properly work.

You see that square🔲? That is the cat symbol when copied. It does not render properly.

Why Fonts Won’t Render

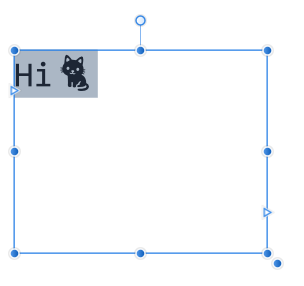
Here is the cat emoji working correctly in Noto Emoji

There are two basic reasons a font will not render.

  1. You did not install the font or you did not select the font when typing.
  2. The font does not have a glyph for that symbol.
  3. Extremely rare but I have a third reason, corruption to the font. I’ve been able to fix this by re-exporting or changing the font to OTF using software such as FontForge. This was the case for a font where select characters would not show such as !#@ etc. I may later create a tutorial on troubleshooting fonts.

How to Set up Glyphs in Affinity Publisher

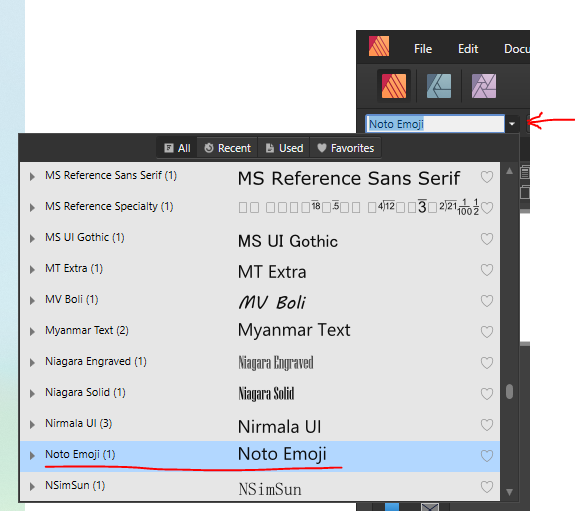
First step is selecting the correct font, after selecting your text tool of choice change the font.

Notice has MS Reference has noticeable renderer errors? That’s because of how they set up their font formatting.
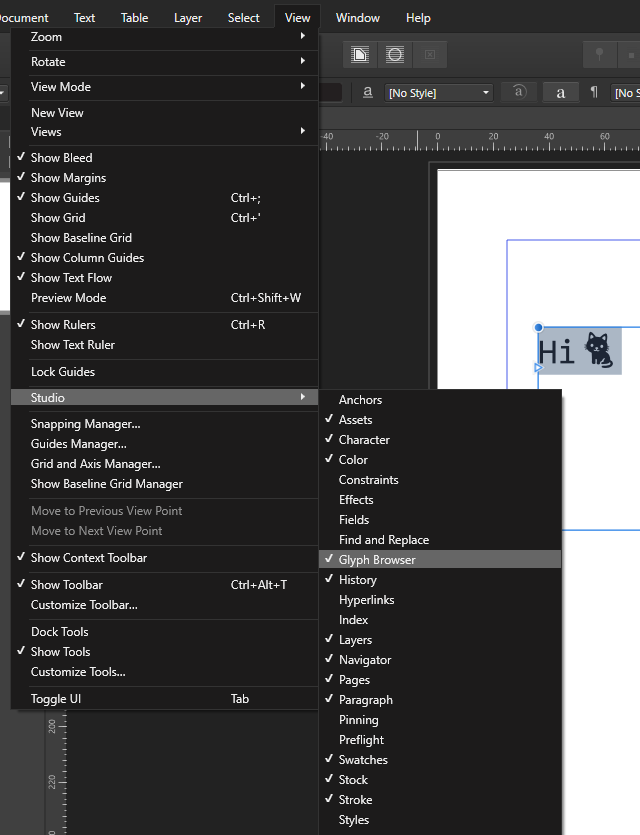
To be able to view all the glyph options in a font go to View > Studio > Glyph Browser
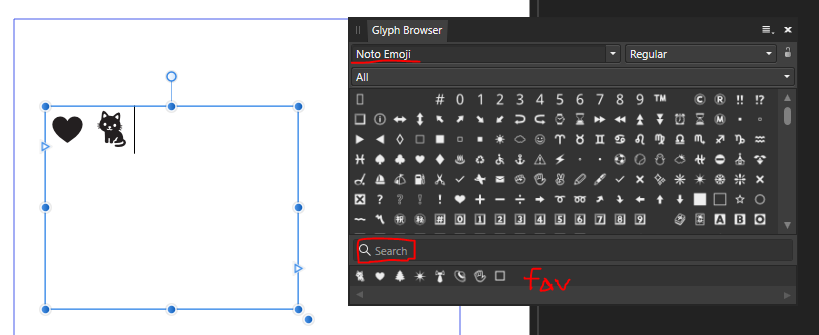
Glyph Browser

From here you can search for emoji’s try typing in “cat”, you should see a range of cat emoji’s popping up. Unfortunately, it does not support emoji search so pasting 🐈 into the search bar will not result in it finding the cat emoji. You will notice recent emoji’s are collected at the bottom of the glyph, if you use a particular font often that will also show there.

Anyway, that is the basics, good luck on future projects!

Extra Tips & Questions

Can I use windows & Mac Emoji’s?

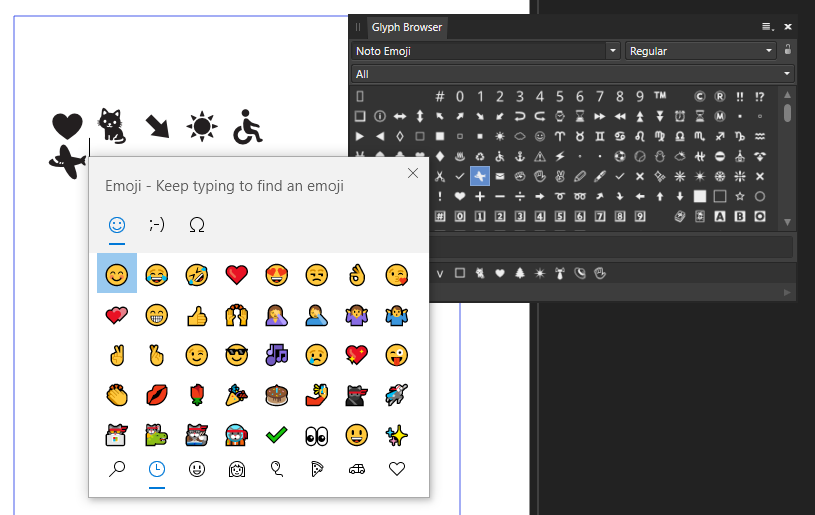
With windows you can hold the windows key + (.) period key to open the emoji window, just click an emoji to paste, it looks weird but converts over correctly if you click on the text area, it should convert over if supported. It can get a little finicky, but I was able to convert window symbols into the noto font this way.

There is something similar you can do with mac that is along the same lines…

Does this work with Japanese kaomoji?

Yes, **✿❀ kaomoji ❀✿** works fine with this, also long as the font supports all the same characters.

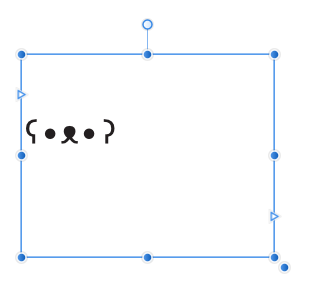
ʕ •ᴥ•ʔ Bear Kaomoji

Does this allow for cool color combo’s?

No, this font is treated like normal text and that all you can do is change the text color like normal. You can always convert the text into a shape and recolor it if you prefer.

You can still do quite a lot by just being able to recolor.

Why not use dingbat fonts?

You can, this just gives you another option. Dingbat fonts like Entypo are really limited though.

What fonts do you recommend again?

Noteable mentions

  • Segoe UI font (Microsoft)
  • Firefox emoji (Very dated)
  • Emoji One… That is a complicated one but you may find an old version floating around. At one point it was FOSS but no more.

Understanding Typography For Your Project

Understanding a little about fonts and typography can go a long way in describing how you think you text should be handled. Typography is often used to connect the reader to the words, and is important when thinking about the design and what you want to emphasize. Here is a quick overview of of some typography terms to get you started.

First what is a font?

A font is a graphical representation of text that can include letters, symbols, sizes, styles and sometimes even color. Fonts are stored on a computer and allow you to change how your text looks.

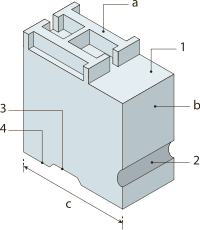
Before fonts were stored on a computer they were made of metal and were used to print text and other symbols on a page. A font was composed of sorts or metal pieces placed in a line on a composing stick to create sentences.

Here is an image of an H sort

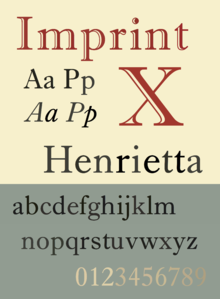
A collection of fonts is called a typeface or font family. Below is an example of different Imprint fonts in the Imprint typeface. Some Imprint font examples would include Imprint Regular, Imprint Italic, Imprint Bold, Imprint Shadowed and Imprint Shadowed Italic.

Font types

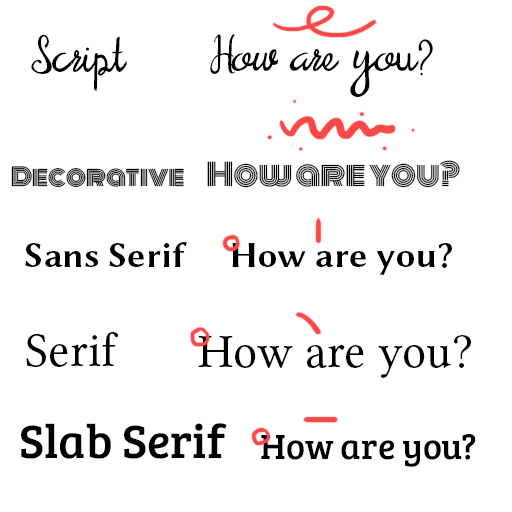
There are a variety of types of fonts out there. Here is a starting point for understanding some main differences, this can be split up further into another 15 categories, but the below should be enough for you to grasp differences in type.

  • Script – Personal Handwriting
  • Decorative – Oddball text that can be a mix of styles or a completely new style
  • Sans serif – Playful geometric text with no overhanging serifs
  • Serif – Soft traditional text with curved overhanging serifs
  • Slab serif – Blocky text with overhanging straight/angular serifs

Spacing

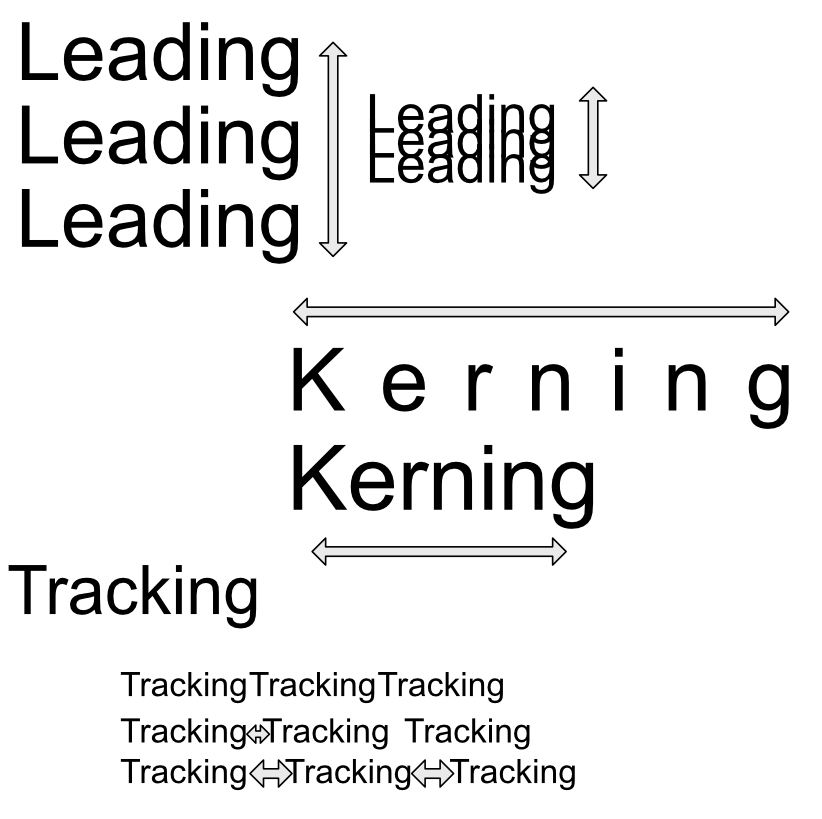
Sometimes text just feels off- a good layout will work to fix spacing issues. Leading is the space between each fonts baseline, you can use leading to fit more or fill out text paragraph height. Kerning is the spacing between letters, to focus on the letters spread them out. Tracking is the space between words, adjusting this can remove orphan words or even out a paragraph. Both kerning and tracking can be used to adjust paragraph width (and sometimes height if orphan words are hanging off the paragraph).

Types of font files on a computer

Before many font options existed something called Adobe’s PostScript (PS) was used to display fonts. It send the data for printing to a printer but was slow and and struggled with some fonts. Apple then stepped in and created TrueType (TTF) and it allowed a lot more freedom with font handling and no longer required the printer to handle the font data, they also created a fair amount of free fonts.

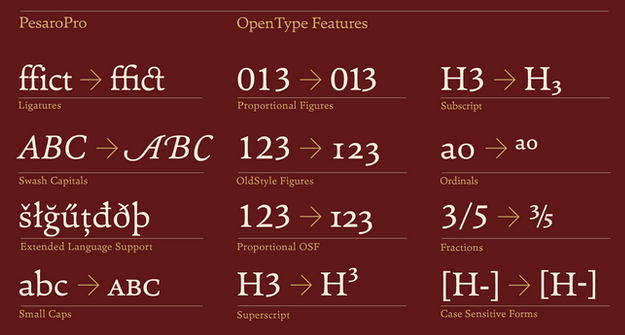
Adobe and Microsoft teamed up to create OpenType (OTF) a file type that extended TTF and added more functionality and storage in the font type. Some of the new functionality included Ligatures, Glyphs, Alternate characters and more.

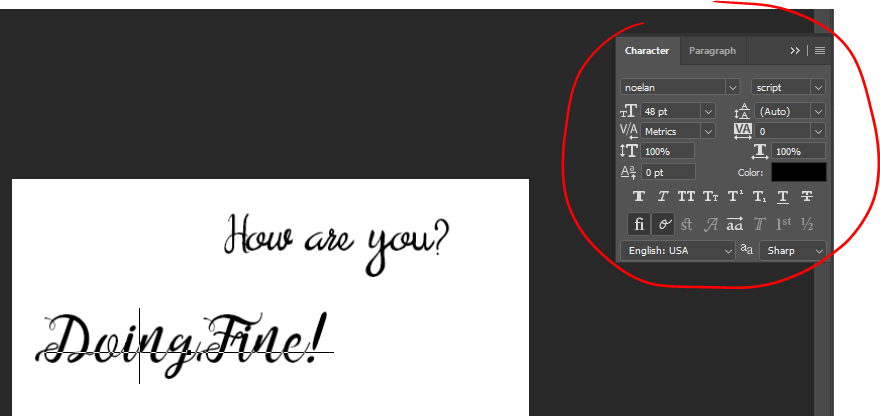
In a nutshell OTF allows greater control and options for one font and is recommend for more advanced typesetting. You can see more options in software like Photoshop and can avoid installing 3-4 TTF fonts with 1 OTF font.

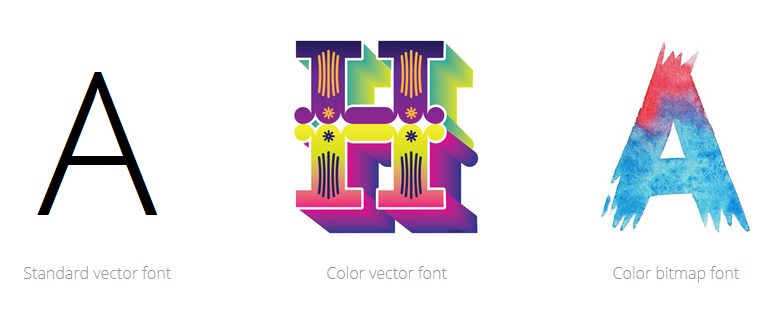
Another somewhat rarely used font file is a type called OpenType-SVG. It just has some additional color options/image options but not a lot of applications support it so I still don’t recommend it yet. It works fine in Adobe software but outside that it is problematic. The other thing is with so many new options it has it’s draw backs like certain fonts will be pixelated if at the wrong scale unlike traditional OpenType.

Smiling Cat Media